Post Type ArchivesRecipes

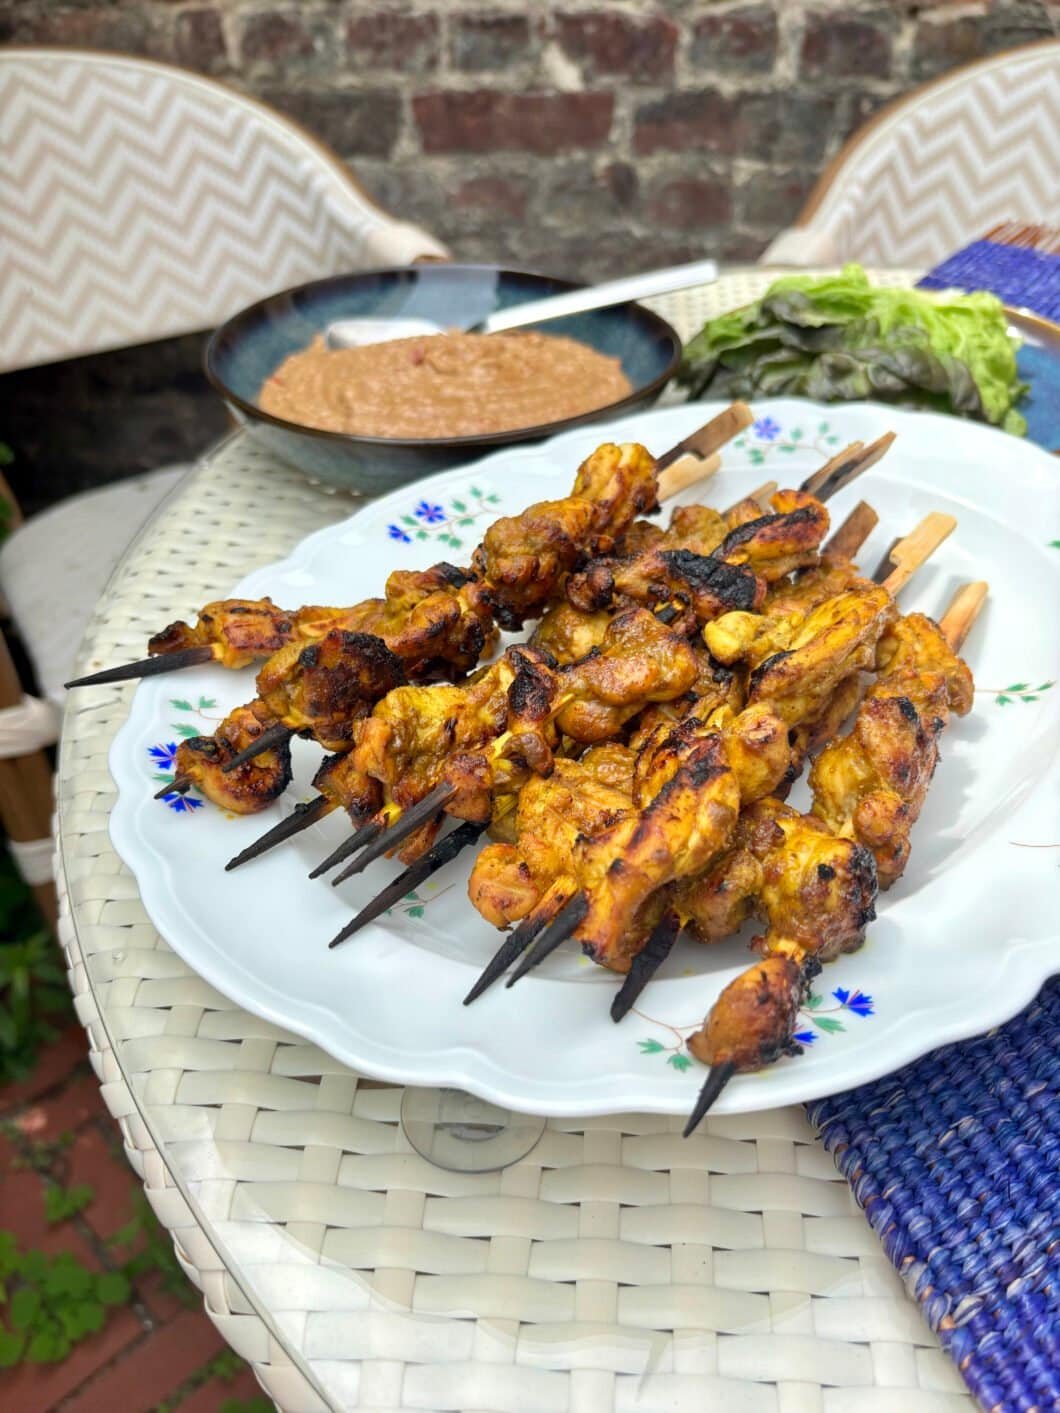
Thai Satay BBQ

I have a very specific memory attached to satay.

It was Bangkok, 9pm, and I was wandering through a night market somewhere near the Chao Phraya with no plan whatsoever. Then the smell hit — charred meat, warm peanut butter, something with lemongrass underneath. I followed my nose like a cartoon character and found a woman grilling chicken skewers over actual coals, basting them from a small bowl, completely unbothered by the chaos around her.

She handed me five skewers, a cup of peanut sauce, and a small dish of what I now know is ajaad — that little vinegar-cucumber pickle — and I stood there on the sidewalk eating the best thing I’d had in weeks. Five skewers became ten. I went back the next night.

This recipe is my version of that. It’s not a quick weeknight thing — the marinade needs time, and time is the whole point. But it is embarrassingly worth it.

Satay Gai — A Thai Street Food Classic

Satay (สะเต๊ะ) is one of those dishes that exists across all of Southeast Asia — Malaysia, Indonesia, Singapore, Thailand — each country with its own version, its own spice profile, its own sauce. The Thai iteration, satay gai (chicken) or satay moo (pork), is defined by its marinade: coconut milk, turmeric, coriander, cumin, and tamarind paste, which together give the skewers that distinctive golden colour and warm, slightly sour depth before the fire even touches them.

The word “satay” itself likely comes from the Tamil catai, brought to Southeast Asia through centuries of Indian Ocean trade routes — which explains why the spice profile has distinctly South Asian notes (cumin, coriander, turmeric) fused with unmistakably Southeast Asian ones (coconut milk, tamarind, fish sauce). It’s a dish built from a thousand years of cross-cultural cooking, and it shows in every bite.

In Thailand, satay is pure street food — sold grilled to order, always served with peanut sauce (nam jim satay) and ajaad, the quick-pickled cucumber relish that cuts through the richness. The three components together — charred smoky meat / creamy savoury peanut sauce / bright acidic pickle — are the architecture of the dish. You need all three. Non-negotiable.

Thai Satay BBQ — Recipe

Ingredients — Advice & key points

  • Coriander seeds & cumin seeds : Whole spices, pounded yourself — not pre-ground. Freshly pounded spices have a brightness and nuttiness that the pre-ground stuff simply can’t replicate. Two minutes with a mortar and pestle. Do it.
  • Tamarind paste : This is what gives the marinade its distinctive slightly sour, deep flavour. Store-bought paste works perfectly well here. Don’t skip it — there’s no real substitute.
  • Coconut milk : Both in the marinade and the peanut sauce. Full-fat, not light. The fat content matters for the texture of the sauce and for how the marinade coats the chicken.
  • Chicken thighs : Boneless, skinless, cut into long strips. Thighs over breasts here — they have more fat, more flavour, and they won’t dry out on the grill. Breast works in a pinch but you lose something.
  • Red curry paste : For the peanut sauce. Store-bought is fine. This is what gives the sauce its depth and colour — it’s not just about heat.
  • Palm sugar : The traditional sweetener here, with a slightly caramel, molasses-like flavour that’s different from regular sugar. If you can’t find it, brown sugar is the best substitute.
  • Roasted peanuts, unsalted : For the sauce. Roasted (not raw) — you want that toasted nuttiness already built in. If you only have salted, just skip adding extra fish sauce.

Cooking process — Advice & key points

  • Marinate overnight if you can. The recipe says 20 minutes minimum — that’s the floor, not the goal. Overnight is where things get genuinely good. The coconut milk tenderises the meat while the spices have time to actually penetrate. If you’re planning a proper dinner, start the marinade the night before.
  • Make the ajaad first. It needs to cool completely before serving. Make it, let it come to room temperature, then pour over the cucumber. Don’t combine the cucumber with the pickling liquid more than 30 minutes before serving — you want the crunch.
  • The peanut sauce is a two-step process. First, you cook down the curry paste in a small amount of coconut milk until it’s very thick and the oil starts to separate from the paste. This blooms the paste and builds the depth of the sauce. Rush this step and it tastes flat. Give it the full 3 minutes on medium heat, stirring constantly.
  • Hot grill, no mercy. 10 to 12 minutes over a hot BBQ. You want actual char on the edges — the slight bitterness of the char against the sweetness of the marinade is the whole flavour contrast. A timid fire gives you pale, sad satay. If you’re cooking breast instead of thigh, it’ll go faster — watch it carefully.
  • Serve everything together. Sticky rice, skewers, peanut sauce in a bowl, ajaad on the side. The way to eat it is to pile a bit of rice, dip the skewer in the sauce, take a bite of ajaad in between. That’s the move. Not traditional, but I love to pile it all inside a lettuce leave, KBBQ-style.
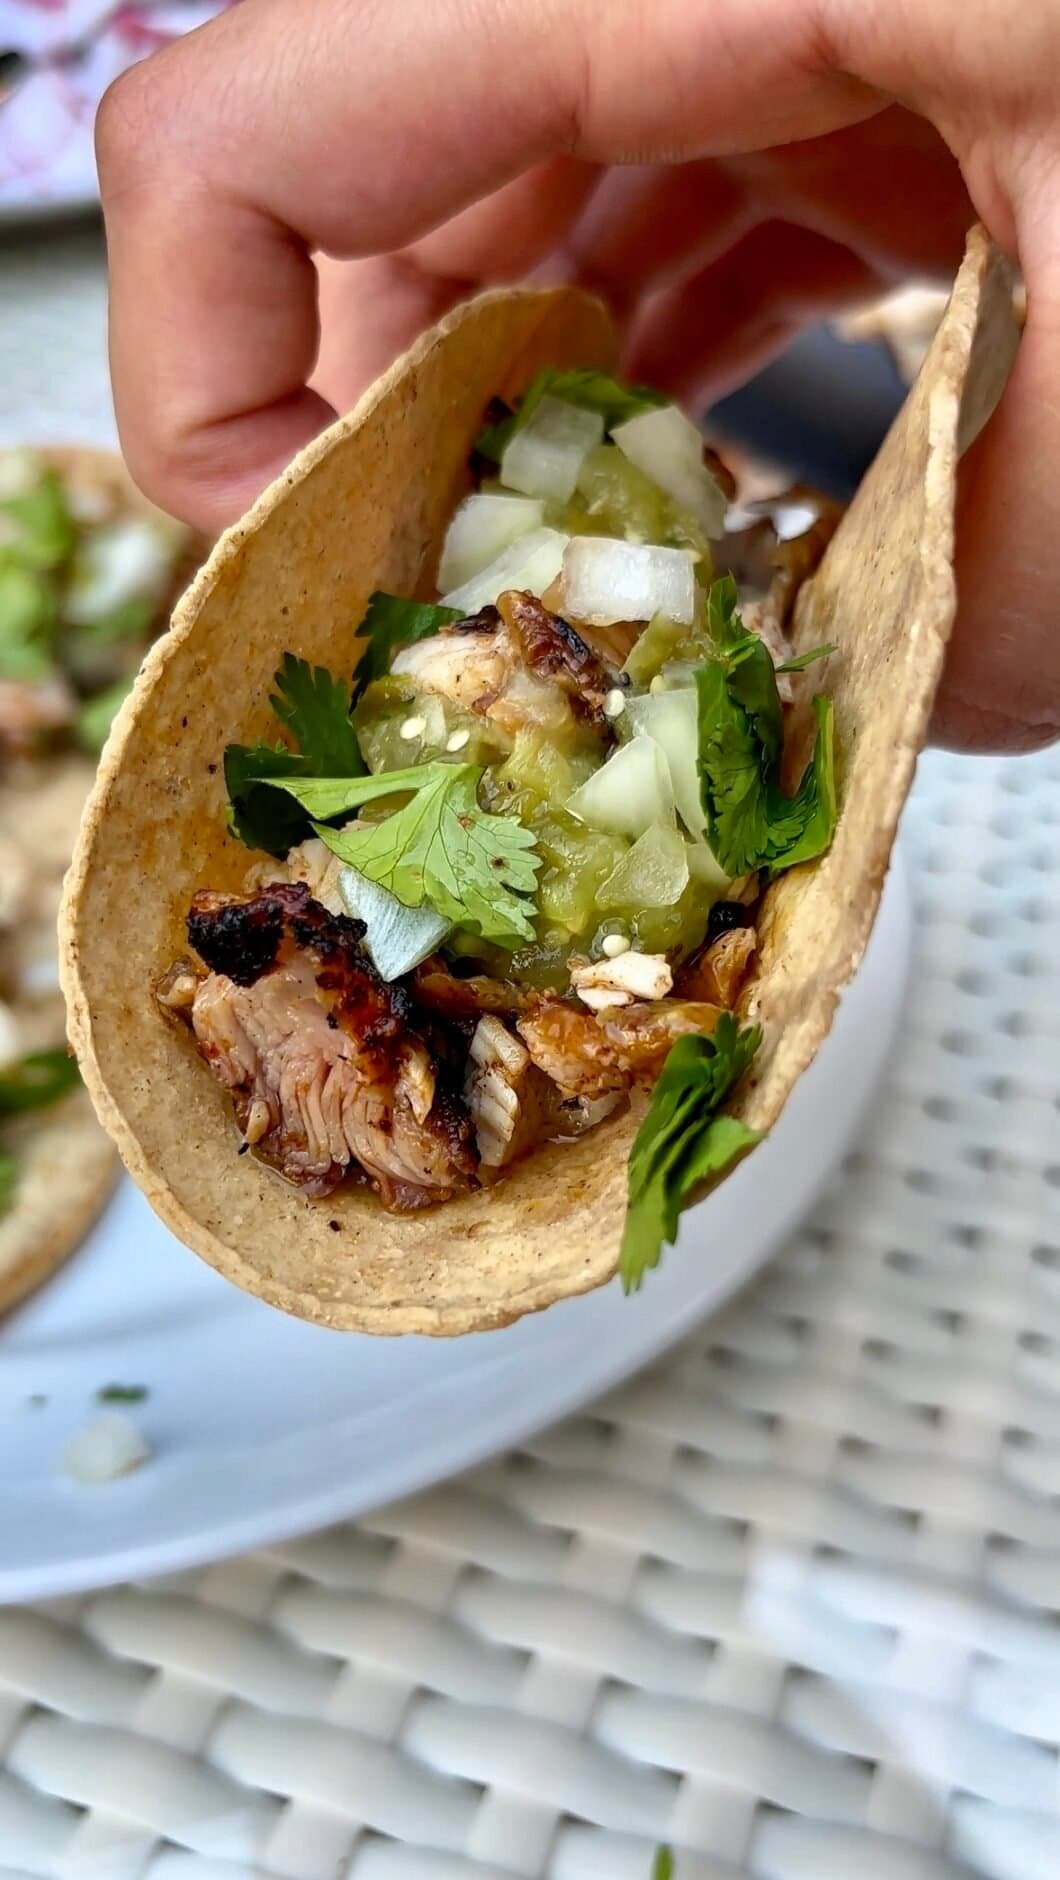
Chicken Tacos (Pollo Asado BBQ)

Once you’ve tried real tacos in Mexico, there’s no going back.

The unassuming street food cart that grills everything right in front of you ? Fire, quite litterally. That’s what I’m going for in this chicken tacos version.

The pollo asado tradition

Pollo asado — literally “roasted chicken” in Spanish — is one of those dishes that exists in some form across every Latin American country, but Mexico’s version is something else entirely. The defining move is the combination of dried spices (cumin, coriander, Mexican oregano) with citrus juice and a hot, aggressive grill. The result is chicken with crispy, slightly bitter char on the outside and juicy, spiced meat inside that pulls apart in big, rustic pieces.

Street taquerias in Mexico City and Guadalajara will have a dedicated pollo asado station — a whole bird or thighs going over flame, someone chopping them up with a cleaver right on the grill, tossing the pieces back in their own juices for that final taqueria finish. I’m lazy so I skipped this part -but the result, let me tell you, was just as good.

What makes this recipe work

Bone-in, skin-on thighs are mandatory here. They have enough fat to baste themselves on the grill, and the skin gets that gorgeous char without drying out the meat. Boneless work in a pinch, but you lose something.

The spice blend is all about building depth before the fire even touches it: ground coriander seeds and cumin bring a nuttiness that pre-ground spices just can’t match. Mexican oregano — if you can find it — has a slightly citrusy, more pungent flavor than Mediterranean oregano. Regular works, but Mexican is worth seeking out.

The MSG is not a mistake. It’s a small amount and it quietly makes everything taste more like itself. Restaurants use it. Now you do too.

Marinate for at least 4 hours, ideally overnight. 24 hours is genuinely better — the citrus tenderizes the meat and the spices penetrate all the way through. The marinade should be a thick paste, not a liquid bath. If it’s too runny, you’ve added too much juice.

BBQ, Air Fryer, or Oven?

The grill is the answer and the only answer if you want real pollo asado. Use an aggressive fire — you want actual charring, not just browning. Start skin-side down and let it go until the skin is deeply marked and starting to crisp. A sad, pale pollo asado comes from a fire that was too timid.

Air fryer: Preheat to 200°C (400°F). Cook thighs skin-side up for 22–25 minutes, flipping halfway. You won’t get the smoke, but the skin crisps up surprisingly well.

Oven: Broil at maximum heat, rack in the top third. About 20–22 minutes, flipping once. Keep the oven door slightly open if your broiler cycles off — you want sustained intense heat. Not as good as the grill, but respectable.

The taqueria finish

After the chicken rests for 5 minutes, chop it roughly with a heavy knife — big, uneven pieces, not a fine dice. Finish with minimal toppings : onion, cilantro, lime. Serve immediately.

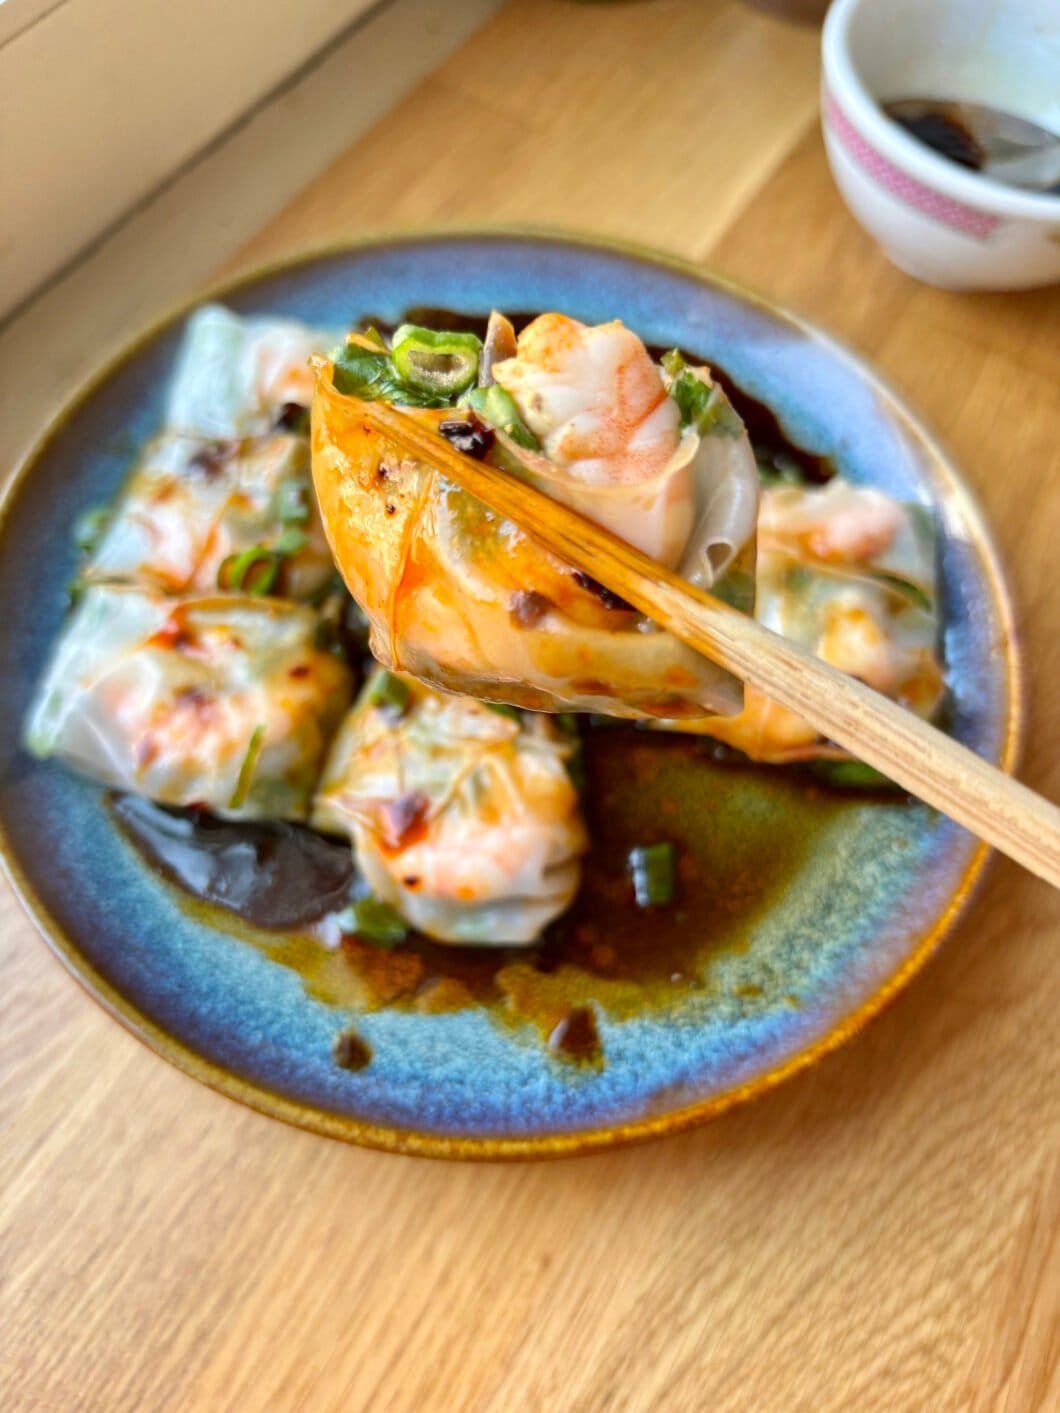
Shrimp Rice Rolls

I love dim sum. So when someone says Cheung Fun -you bet I’m in.

Those bad boys are a whole side quest in themselves tho; I had to recreate them my own lazy way. And when I saw videos on the viral shrimp rolls using rice paper, I thought: bingo.

My shrimp rice rolls look kinda restaurant-level, but they’re genuinely one of the easiest things you can make at home. You need a steamer (or a wok + a plate + a lid — same deal), rice paper sheets, shrimp, herbs, and 30 minutes.

The sauce is non-negotiable. It’s the whole point. Don’t skip it, don’t simplify it — it’s what takes this from “nice snack” to “I need to make this every week.”

Shrimp Rice Rolls — A Dim Sum Classic

Shrimp rice rolls — known as har cheung fun (蝦腸粉) in Cantonese — are a staple of Hong Kong-style dim sum. Cheung fun literally means “intestine noodle,” which sounds alarming but just refers to the shape: long, rolled, tube-like rice sheets. Not actual intestines. Promise.

Traditionally, cheung fun is made by spreading a thin rice flour batter onto a flat tray, steaming it until just set, then rolling it around a filling — shrimp being the most beloved version. In dim sum restaurants, this is done to order, plate by plate, in the back kitchen, and the rolls arrive at your table impossibly fresh and warm.

This version uses rice paper sheets as a practical home shortcut — no rice flour batter, no special tray, no dim sum cart required. You get that same silky, translucent wrapper and the same intensely satisfying texture. The key is a quick dip in warm water (not long — we’re talking a few seconds) and steaming for exactly 4 minutes 30 seconds. That’s the texture window: silky and translucent, never gummy.

The sauce — a sweet soy with ginger-scallion oil — is deeply dim sum in spirit. It’s what you remember.

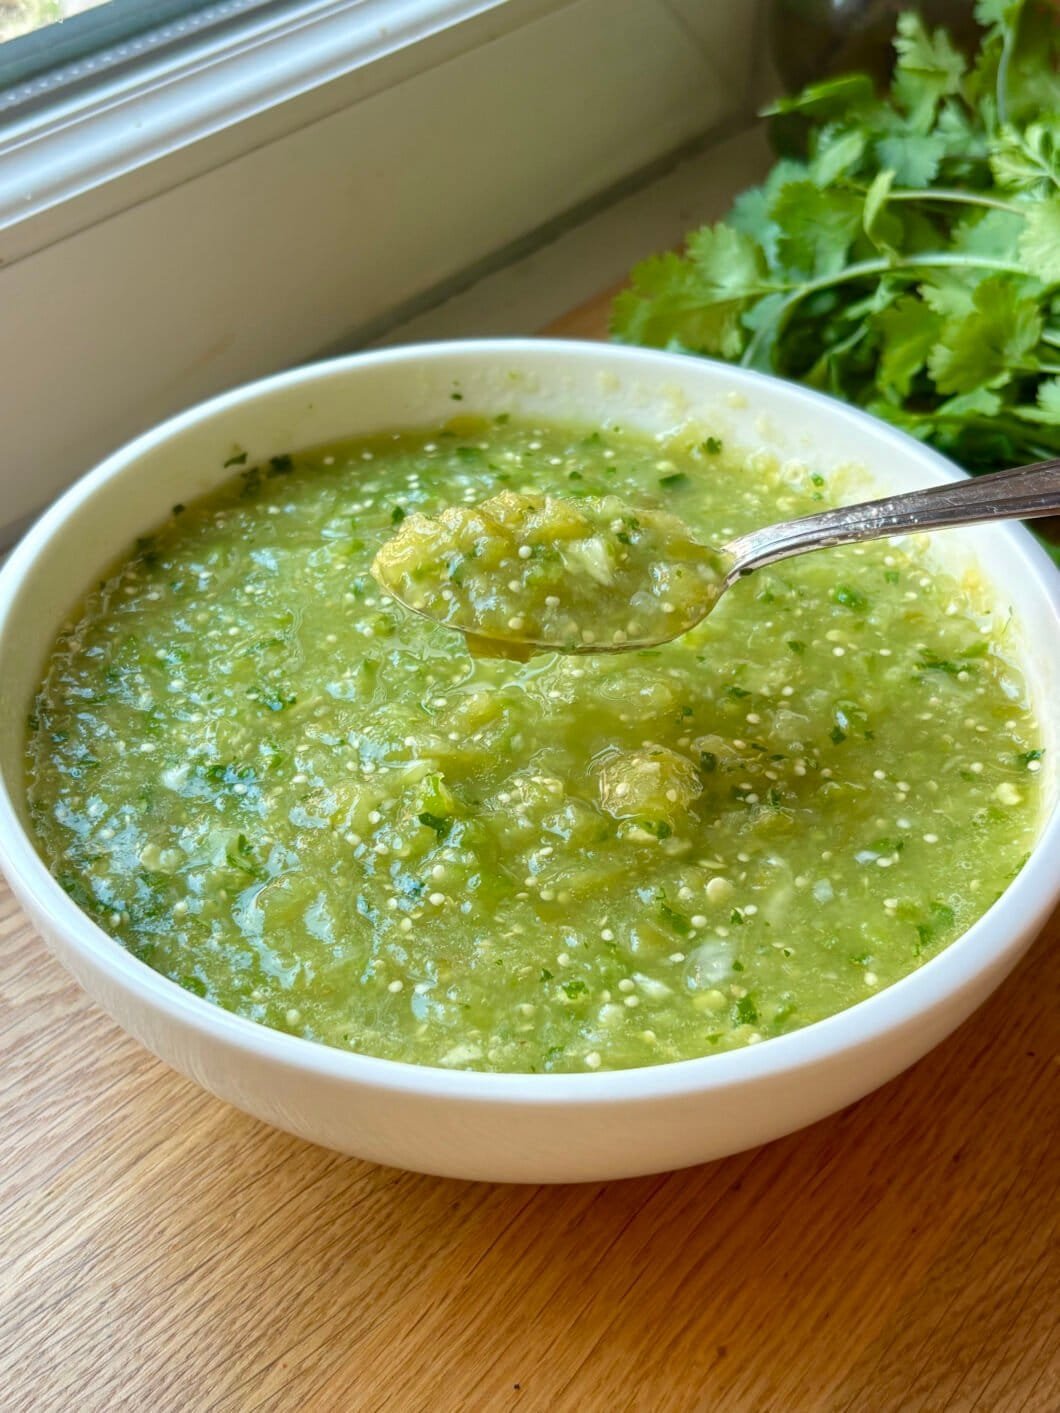
Easy Salsa Verde

The first time I had a proper salsa verde was not in Mexico.

It was in someone’s apartment kitchen, during a dinner that had no business being as good as it was. The host — a friend of a friend — casually pulled a blender from the counter and tossed in tomatillos, a handful of cilantro, some chiles, a chunk of onion. Thirty seconds later, she had poured this vivid, glossy green sauce into a bowl and slid it onto the table like it was nothing.

I dipped a chip. Then I dipped about fourteen more chips in rapid succession. It was tangy and bright and had just enough heat to make you reach for another one immediately. There was nothing subtle about it — and that was the entire point.

I went home that night and immediately Googled how to make it.

Turns out it’s one of the easiest things in the world to make. Which is both amazing and slightly annoying, given how many years I spent not making it.

Easy Salsa Verde — A Mexican Essential

Salsa verde (literally “green sauce”) is one of the cornerstones of Mexican cuisine. Unlike its red counterpart, which is built on dried chiles and tomatoes, salsa verde gets its character from tomatillos — small, tart, husked fruits that are related to the gooseberry family and have absolutely nothing to do with tomatoes despite how they look.

The sauce appears across the country in dozens of forms: raw, roasted, boiled, blended smooth or left chunky. It shows up as a taco topping, a braising liquid for pork (the legendary chile verde), a sauce for enchiladas, a dip, a marinade. It is, in short, everywhere — and for very good reason.

This version here uses canned drained tomatillos for maximum ease and availability, blended raw with onion, garlic, chiles and cilantro for that bright, punchy freshness. It’s closer to a salsa cruda in spirit — bold, tangy, and done in five minutes flat.

Easy Salsa Verde — Recipe

Ingredients — Advice & key points

  • Tomatillos : This recipe uses canned tomatillos for ease — drain them well before blending. If you can find fresh tomatillos (check Mexican or Latin grocery stores), remove the husks, rinse off the sticky coating, and use them raw. Fresh will give you a slightly brighter, more vegetal flavour.
  • Chiles : Serrano chiles are the classic choice here — they have a clean, bright heat. If you can’t find them, jalapeños work perfectly as a milder substitute. However if, like me, you can’t find either,  1 large green chili + 1 small Thai green chili is a good workaround. Start with less if you’re heat-sensitive — you can always add more, you cannot subtract.
  • Cilantro : Don’t skip it. Cilantro is structural here, not decorative. That said, if you’re one of the people who tastes soap (it’s genetic, genuinely), you can reduce the quantity significantly and compensate with a little extra lime juice.
  • Chicken broth : Just 80ml — it loosens the sauce and adds a subtle savoury depth. Vegetable broth works fine as a substitution if you want to keep this fully vegetarian.

Blending — Advice & key points

  • Pulse first, then blend shortly. A few pulses before you go full-speed gives you better control over the texture. Salsa verde should be smooth-ish but not completely liquid — a little body is a good thing.
  • Season it well. Blend first, then adjust salt, and taste again. It must be salty enough, or the salsa will taste flat.
  • It gets better after 30 minutes. Like most sauces built on acidic ingredients, salsa verde relaxes and deepens once the flavours have a moment to merge. If you can make it ahead, do.
  • Storage : Keeps refrigerated for up to 5 days in an airtight jar. It may darken slightly — that’s normal, it’s the cilantro oxidising. Give it a stir before serving.

Now go make something that needs this on top of it. (everything!!!!)

Wontons in Soy

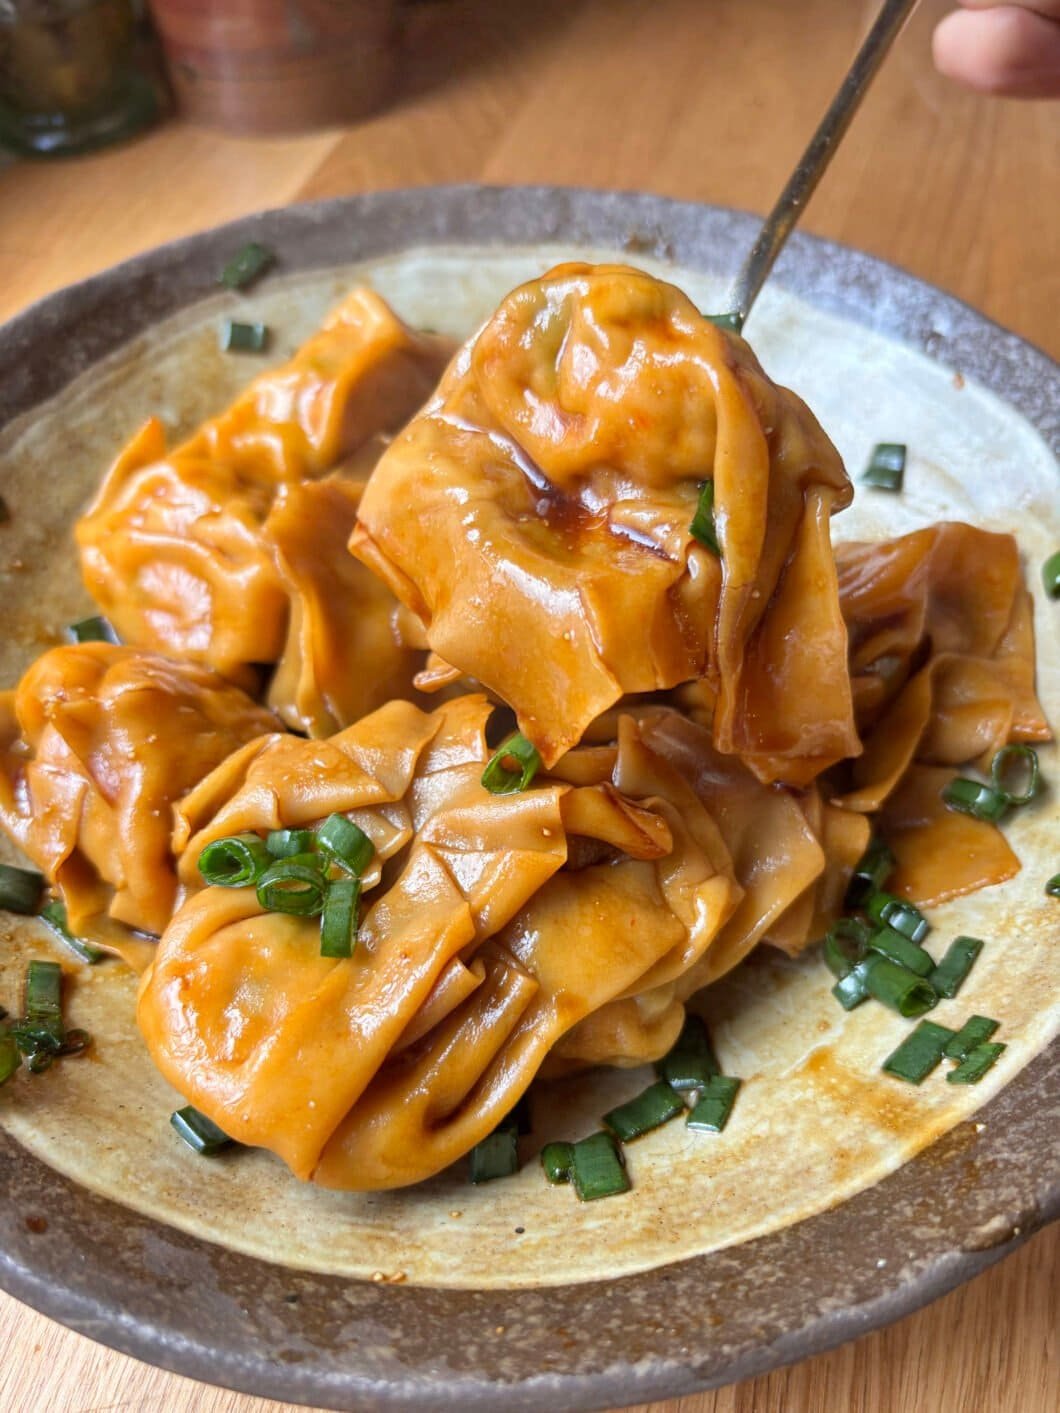
Here’s the thing about wontons in soy — they’re the more understated sibling of the Sichuan chili oil version. Less fire, more depth. The sauce is simple to a fault, and that simplicity is exactly why every single ingredient has to do real work. There’s nowhere to hide. Nail the soy ratio, nail the scallion oil, and you’ve got one of the most quietly satisfying bowls out there.

Quick to assemble, endlessly comforting, and if you already have frozen wontons in the freezer (which you absolutely should, at all times) — this is a 10-minute dinner. Maybe 15 if you make the scallion & ginger oil from scratch.

Highly recommend.

Wontons in Soy — A Chinese Classic

Wontons (馄饨, húntun) are one of the oldest forms of filled dumplings in Chinese cuisine, with roots going back over a thousand years. Unlike jiaozi, which are typically thicker-skinned and pan-fried or boiled, wontons are wrapped in a much thinner, silkier dough — which gives them that characteristic delicate, almost translucent appearance once cooked.

The “in soy” preparation is particularly associated with Cantonese and Shanghainese home cooking, where the emphasis is less on heat and more on layered umami. The sauce is built around the contrast between light soy (brightness and saltiness) and dark soy (depth and colour), balanced with the tartness of Chinkiang vinegar — China’s answer to a complex, slightly sweet rice vinegar — and finished with scallion & ginger oil.

That scallion oil is everything here. It’s what transforms a simple soy dressing into something that feels almost magical: the hot oil blooms the aromatics, releasing a fragrance that coats every wonton as you toss them together.

Add MSG? Absolutely. The Chinese have been using it forever, and for good reason. A good pinch elevates the sauce to restaurant level. If you’re still MSG-shy, it’s your call — but I’ve converted most of my skeptical friends.

Wontons in Soy — Recipe

Ingredients — Advice & key points

  • Wontons : Go homemade if you can — this pairs perfectly with the same wonton filling as the chili oil version. But frozen store-bought wontons work absolutely fine here. The great equaliser is the sauce.
  • Light vs. dark soy sauce : These are not interchangeable. Light soy (生抽) is saltier and thinner — it does the flavour heavy lifting. Dark soy (老抽) is thicker, less salty, and adds a rich mahogany colour and subtle sweetness. You need both.
  • Chinkiang vinegar (also spelled Zhenjiang) : A Chinese black vinegar with deep, slightly smoky, subtly sweet complexity. Don’t substitute with regular rice vinegar — the flavour profile is completely different. Find it in any Asian grocery store.
  • MSG : Optional but genuinely recommended. One good pinch transforms the sauce. Monosodium glutamate is simply a purified form of the umami found naturally in tomatoes, parmesan, seaweed. Not scary at all.
  • Scallion & Ginger Oil : Make this ahead if you can. It keeps in the fridge for up to 2 weeks and makes everything better — drizzle it over rice, noodles, eggs. This recipe makes more than you need for one portion; scale up and thank yourself later.

Cooking process — Advice & key points

  • Save your cooking water. The starchy wonton boiling water is liquid gold here — it loosens the sauce and helps it coat every surface. Add 2–3 tablespoons and adjust to your liking.
  • Don’t overcook the wontons. Once they float to the surface and stay there for about 30 seconds, they’re done. Overcooked wontons become mushy and the filling gets rubbery.
  • Make the sauce in the serving bowl. Add the wontons directly to the sauce bowl, then toss gently. This ensures maximum coating without over-mixing.
  • The scallion & ginger oil: The oil must be hot but not smoking. Drop a piece of scallion in — if it sizzles and bubbles, you’re in business. The white part goes in first with the ginger (they need time to slowly infuse), then kill the heat and add the green tops raw — the residual heat does the work while keeping the freshness.

Spicy Cold Noodles (Bibim Guksu)

I remember the first time I had bibim guksu.

It was summer, it was stupid hot, and I absolutely did not want to cook. But I also did not want another sad sandwich. I was staying with a Korean friend who casually pulled out some leftovers from the fridge — kimchi, a boiled egg, half a cucumber — and threw together the most vibrant bowl of noodles I’d ever seen in under 10 minutes.

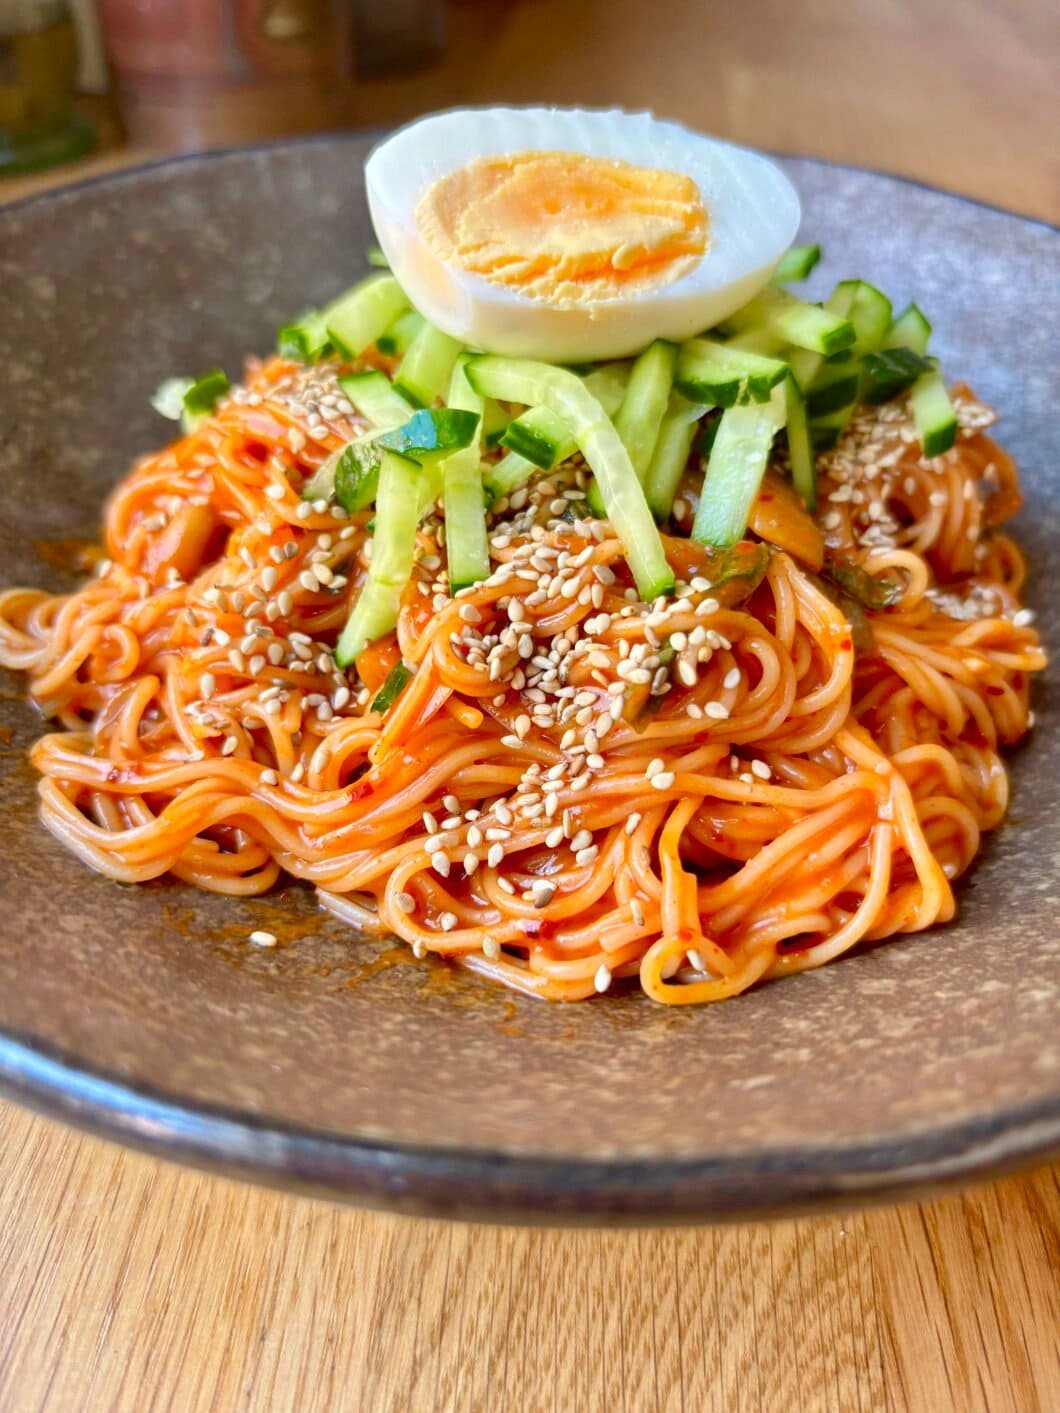
Cold, spicy, a little tangy, a little sweet. The noodles were slippery and bouncy. The kimchi was funky and fierce. The whole thing was alarmingly refreshing for something that made my nose run.

I asked for seconds before I’d even finished the first bowl.

That was it. The obsession started there.

Bibim guksu is one of those dishes that looks deceptively simple and tastes like someone who really knows what they’re doing made it. No heat required (except for 5 minutes of boiling water). No complex technique. Just good ingredients, a punchy sauce, and the willingness to mix everything aggressively.

It’s the kind of meal that feels like summer on a plate — which, is exactly when Koreans traditionally eat it. Cool noodles to fight the heat.

Highly recommend.

Bibim Guksu — A Korean Summer Classic

Bibim guksu (비빔국수) literally translates to “mixed noodles.” Bibim means mixed, guksu means noodles — and the act of mixing is very much the point.

Unlike ramen or udon served in broth, bibim guksu is a dry noodle dish: thin wheat noodles tossed in a cold, bold sauce, with toppings piled on top. It’s a staple of Korean home cooking, especially in summer, when heavy stews and soups lose their appeal.

The base sauce varies by household, but the soul of the dish is always the same: gochujang (fermented chili paste) for heat and depth, sesame oil for richness, and some form of acidity to cut through. Here, the kimchi does double duty — it’s both a topping and a key ingredient in the sauce, with the kimchi brine bringing that funky, sour punch that makes the whole bowl sing.

The toppings are flexible, but a halved boiled egg, cucumber matchsticks and sesame seeds are pretty classic. And honestly, pretty perfect.

Bibim Guksu — Recipe

Ingredients — Advice & key points

  • Somen noodles : These thin wheat noodles are the go-to for bibim guksu, and for good reason — they’re delicate, quick to cook, and take on the sauce beautifully. If you can’t find them, no problem : udon or ramen work as a substitute, as they maintain this bouncy texture we love. A close substitute would also be soba noodles.
  • Kimchi : The more fermented, the better. Fresh kimchi is fine, but well-aged kimchi has a depth of flavour and a sourness that transforms this dish. Don’t skip the brine — it’s liquid gold here.
  • Gochujang : Don’t substitute with generic chili paste. Gochujang has a fermented, slightly sweet, earthy heat that is very specific and very necessary. You should be able to find it in any Asian grocery store -now you can even find some at large grocery stores!
  • Gochugaru : Gochugaru = Korean red chili flakes -a staple in the Korean pantry. You can skip it altogether if you don’t already have it.
  • Corn syrup vs sugar : Corn syrup gives a slight glossy finish to the sauce and a rounder sweetness. Sugar works perfectly well as a substitute — just use slightly less, as it’s sweeter.

Cooking process — Advice & key points

  • Rinse those noodles properly. After cooking, rinse under cold running water until they’re genuinely cold and have lost any stickiness. Drain well. This step is what makes bibim guksu refreshing rather than gluey.
  • Mix the sauce first, then add the noodles. Building the sauce in a large bowl before the noodles go in means everything coats evenly from the start.
  • Serve immediately. Bibim guksu waits for no one. The noodles will absorb the sauce and soften as they sit — which is fine for leftovers, but the texture straight after mixing is really the best version of this dish.
  • Taste and adjust before adding the noodles. More gochujang for heat, more sesame oil for richness, a splash more brine for tang. Make it yours.
  • Careful : the dish is spicyyy ! Remove gochugaru for a tad less heat, but it’ll still be quite spicy nonetheless.

Chili Oil Wontons

I used to order chili oil wontons at least once a week.

It became my own personal drug.

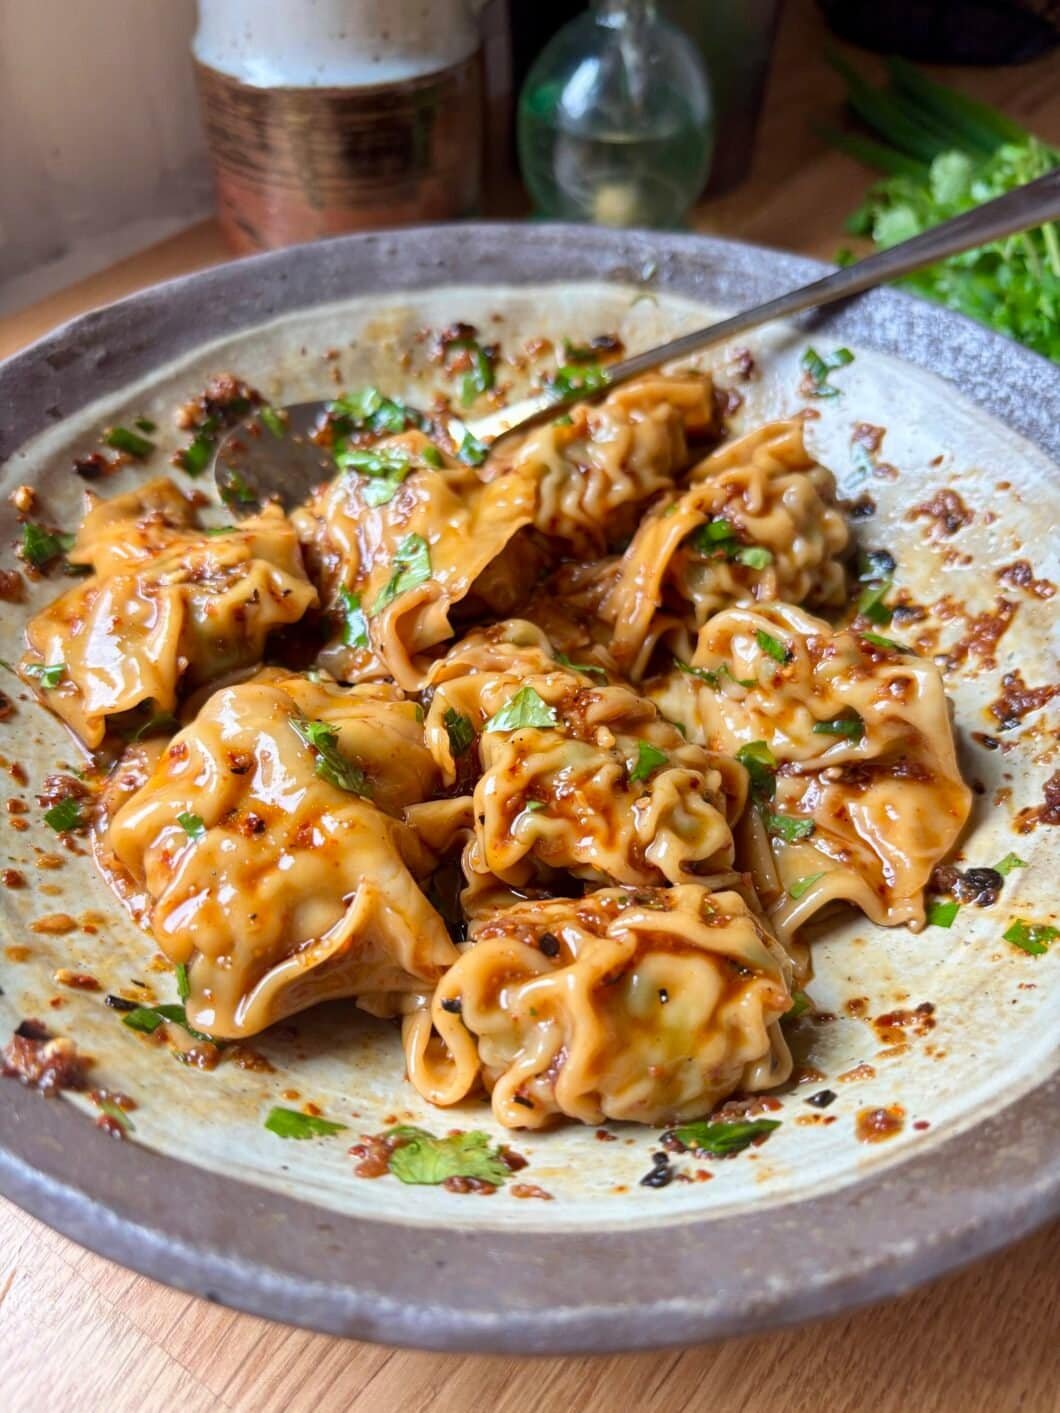
There was this small place — nothing fancy — but the wontons came drenched in this deep red chili oil, glossy and aromatic. Garlic, vinegar, heat, a hint of sweetness… and those soft pork wontons underneath, soaking everything up.

It was sheer comfort for me. My fellow heat lovers know what I’m on about. The tingling, the painful but so pleasurable heat; and the instant relaxation that comes with eating properly spicy noods and/or dumplings. Like your body saying: about time!

Some days I’d go just for that bowl. Other days, I’d order them on the side — but somehow they always became the main event. There’s something about chili oil wontons that’s dangerously addictive: they’re light, but intensely flavorful. Spicy, yet soothing. Simple, yet deeply layered.

And then I moved to Lille.

Dayum.

No chili oil wontons in sight — none.

It felt slightly unreasonable, if you ask me. Possibly reason enough to go back.

A whole city, and not a single proper bowl? I somehow understood why Parisians were so Paris-centric.

I briefly considered the obvious solution: open a restaurant.

But in the meantime, I did what any obsessed person would do — I started making them at home.

And honestly?
NEVER. GOING. BACK.

A Dish Inspired by Sichuan

Chili oil wontons are strongly inspired by Sichuan cuisine, particularly Hong You Chao Shou (红油抄手) — Sichuan wontons served in chili oil.

Unlike Cantonese wontons, which are usually served in broth, Sichuan-style wontons are:

  • coated in chili oil
  • brightened with vinegar
  • loaded with garlic
  • balanced with sweetness
  • often finished with herbs.

It’s all about contrast: this bowl should be spicy, aromatic and savory, but also slightly sweet and lightly tangy.

Chili Oil Wontons – Recipe

Ingredients – Advice & key points

For some ingredients in this dish (like the Chankiang vinegar, or the Sichuan black pepper), you might need to visit an Asian store :

  • If you’re in Paris :
    • your could go to the K-mart near Opera (there are several others K-marts, check on Google) ;
    • you can also go to Tang Frères in the 13th (they have other stores in Paris but be careful, some are small, this one is large) or Paris Store in the 10th ;
    • ever since I moved to the 18th, I’ve been going to XP 16 or Chen Market, but those shops are slightly smaller, especially XP16, and you might not find everything you need. 
  • If you’re in France :
    • Paris Store has several shops across the country ;
    • you can also order online ! There are several online Asian websites you can order from.
    • For my foreign friends : I bet you can easily find some Asian shops around you or online, but if you can’t, message me with your location and I will try to find it for you !

Cooking process – Advice & key points

  • Use Chinese chili flakes, not chili powder
    → better texture, better aroma

  • Don’t skip the hot oil pour
    → releases fragrance

  • Careful though ; only use heatproof bowls (ceramic, glass, or metal) for this hot oil pour.
  • Add hot cooking water
    → emulsifies sauce

  • Use fatty pork 
    → juicier wontons

Make This a Lazy Recipe

Here’s the real trick: Freeze your wontons.

Lay them on a tray -> Freeze until solid -> Transfer to freezer bag.

Then whenever the craving hits:

  • boil frozen wontons (5 min)
  • make the sauce (10 minutes)

That’s it.

Which makes chili oil wontons one of the best lazy comfort meals you can have ready.

Got everything you need ? Let’s fill your belly with spicy-ass dumplings !

PS : The wonton recipe will provide you around 40-50 dumplings, which is good for ~4 servings depending on your appetite ! Don’t forget to buy enough dumpling wrappers.

Halloumi Pita (Shawarma-Style Vegetarian Kebab)

I’m not vegetarian, but I absolutely love halloumi.

There’s something about it — the salty bite, the way it browns beautifully, the chewy texture that almost feels… meaty. It’s one of those rare ingredients that can genuinely stand at the center of a dish without feeling like a compromise.

So when I saw FoodieHolly peel her halloumi into thin strips to create shawarma-style kebab filling, I immediately thought: what a brilliant idea.

Because besides than this being ridiculously cute -I know you feel excited about peeling halloumi, come on- it makes perfect sense technically.

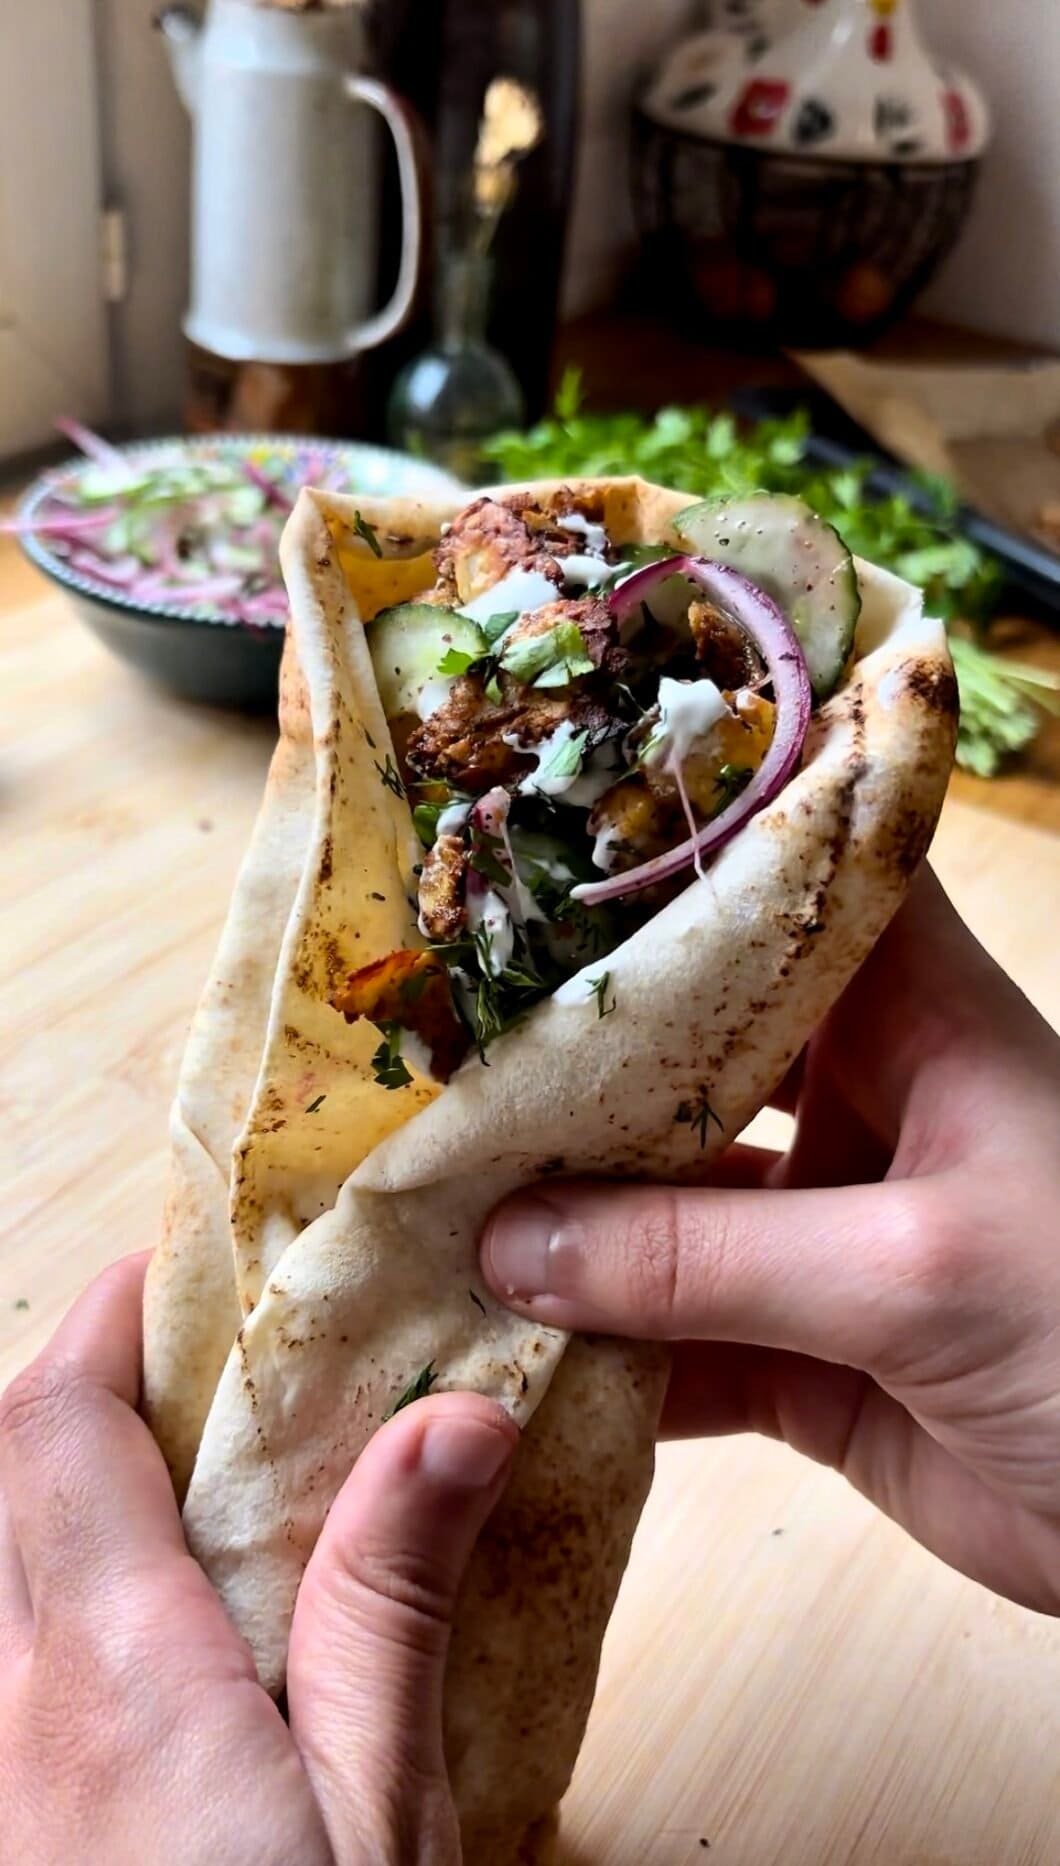
Instead of thick slices that can sometimes turn rubbery, the halloumi becomes thin, golden ribbons — slightly crisp at the edges, soft and juicy in the center, and perfect for stuffing into warm flatbreads.

Here, the halloumi is tossed with warm spices — cumin, coriander, smoked paprika, cinnamon — then roasted until just golden. It’s paired with sumac-pickled red onions, fresh cucumber, loads of herbs, and a creamy garlic yogurt sauce that brings everything together.

The result? Something between a vegetarian shawarma, a halloumi kebab, and the kind of street food you’d happily queue for.

Even for committed meat lovers.

And the best part?
This halloumi pita recipe is ready in under 30 minutes, with minimal prep and maximum flavor.

If you’re looking for a vegetarian pita recipe, a halloumi wrap, or a shawarma-style vegetarian sandwich, this might quickly become one of your favorites.

Halloumi Pita (Shawarma-Style Vegetarian Kebab) – Recipe

Before you start, a few important tips make all the difference:

Ingredients – Advice & key points

  • Halloumi : It may seem obvious, but do not try to replace halloumi! This recipe was specifically crafted for halloumi. If you use any other cheese, it will melt. Definitely not the aim here.
  • I love using thin flatbreads from Middle Eastern grocery stores — they wrap beautifully and feel extra authentic. But regular flatbreads or pita bread work perfectly well too, even slightly thicker ones.

Cooking & prep – Pieces of advice

  • Don’t overcook the halloumi. You’re aiming for golden, not golden brown. If it gets too dark, it will turn firm and slightly tough as it cools.
  • Don’t salt anything. Halloumi is already quite salty, and once roasted, it seasons the entire pita naturally.

Now come and cook !

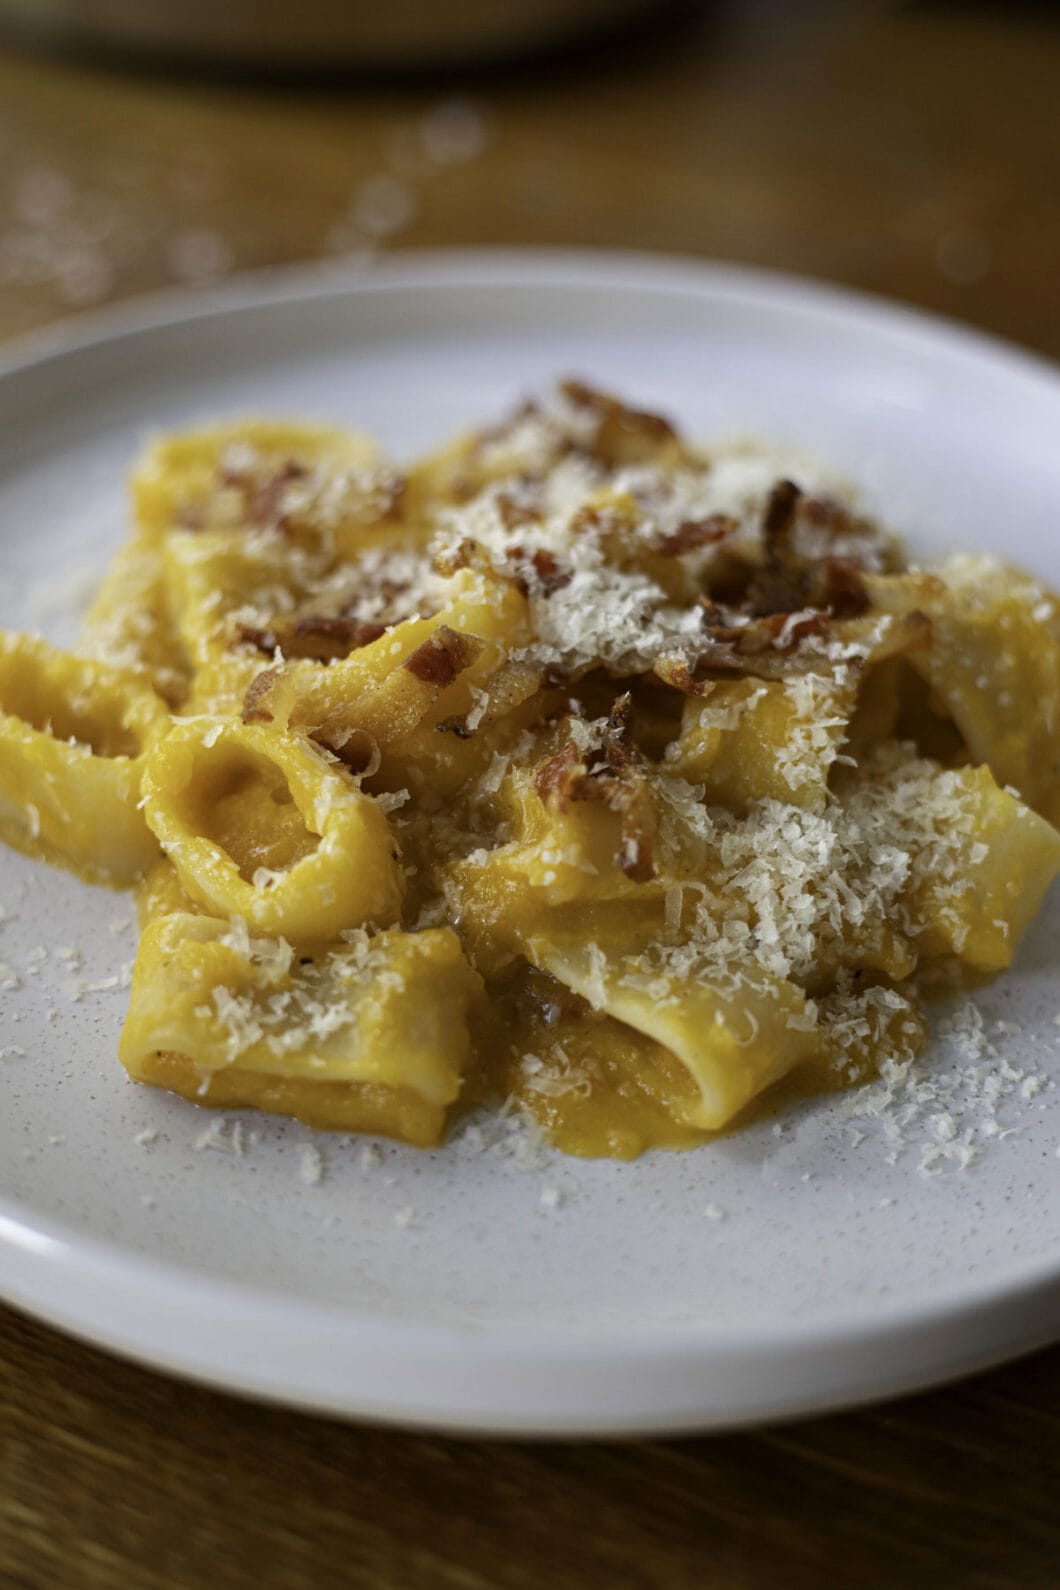
Butternut and guanciale pasta

If you could have a dish reminiscent of carbonara AND eat your veg, that’d be a no-brainer, right ?

Well, there you have it. And there is absolutely no sacrifice flavour-wise.

I’d say you could eat it without guanciale for my fellow vegetarian friends, because the magic happens with this creamy butternut sauce paired with lemon zest. Squash and lemon is a classic association that does not disappoint.

Of course though, the guanciale adds some decadent flavour to these nutty, fruity pasta.

Have at it. And send me love messages when you’re done.

Butternut and guanciale pasta – Recipe

Most of my recommendations here are similar to those on the Authentic Carbonara recipe.

Ingredients – Advice & key points

I usually go to Eataly to get the produce I need. If you don’t have one near your location, you can find fresh produce like guanciale and pecorino at your local Italian deli, maybe even your pasta. For pasta, if not available there, you should be able to order it online quite easily.

  • Pasta :
    • I believe calamarata is a grat choice here, as the sauce will nestle in the pasta’s holes, but you could also use another type you have on hand, preferably short (because the sauce is heavy).
    • If you chose to sieve your sauce though, it will get much thinner, so you can opt for long pasta.

What you must not compromise on is using Bronze Drawn pasta. Why so ? Because when processed this way, the pasta will present small irregularities that will enable the sauce to cling to it.

  • Guanciale : You can buy it in blocks at your deli or have it pre-sliced. We want quite thin slices -not paper-thin, but almost- so that they crisp up in the pan, about 1,5cm x 4cm.

Cooking your pasta – Pieces of advice

  • Pasta :
    • While 10g of salt/liter is usually recommended, here I’d recommend only 7g/liter because of the guanciale.
    • As for most pasta recipe, we’ll finish cooking the pasta in the pan with the sauce. Contrary to classic carbonara, we’ll just put them in for the last 4 minutes (there is not as much water here and we don’t want risking the sauce to be too watery).   
    • It is important that you taste several times starting 2 minutes before the packet theoretical time, so that you get perfect al dente pasta
  • Guanciale :
    • You want to crisp it up, but still let the fat melt. Therefore, cook on medium heat. The process should last around 6 to 7 minutes.
  • Plating :
    • I recommend heating your plates in the oven for 10 minutes at 80°C before plating. This will keep your pasta warm longer and will prevent the sauce from getting cold too quickly and become unappealingly “set”.

Now come and cook !