Post Type ArchivesRecipes

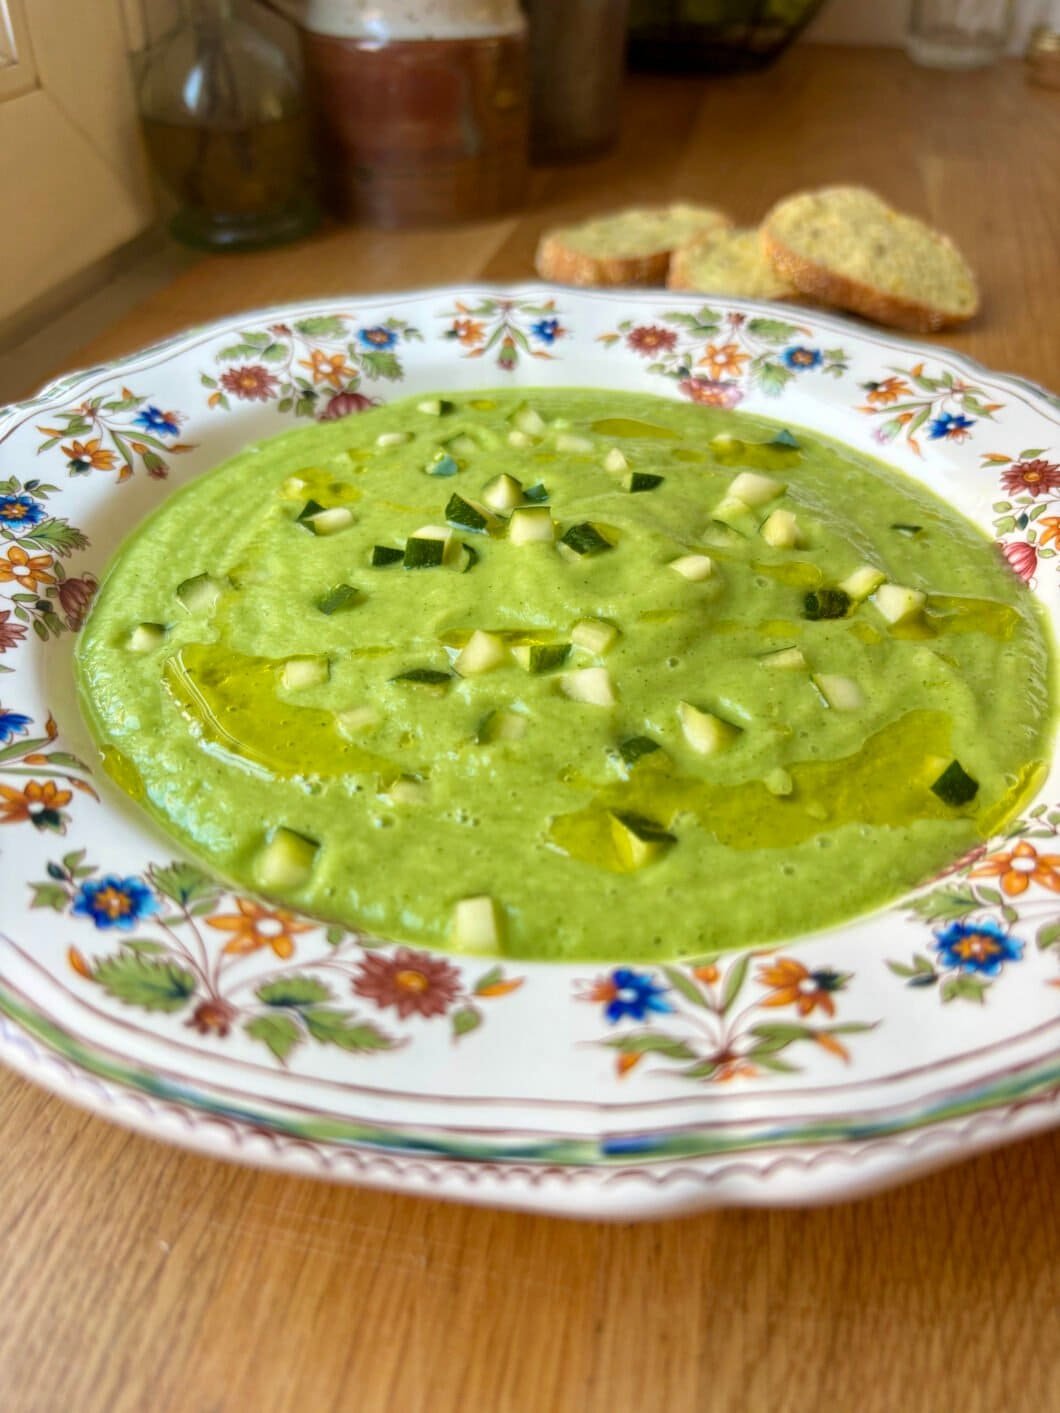
Zucchini Gazpacho

It was one of those weeks where your fridge slowly fills up with vegetables you bought with good intentions. There they were: three zucchinis, sitting in the crisper drawer, not getting any younger. And outside? A proper heatwave. The kind of heat where even opening the oven feels like a personal attack.

Cooking was out of the question. But I still had to eat, and I still had to deal with those zucchinis. I thought about a cold soup — but zucchini? Raw? Without cooking? I was skeptical. More than skeptical, honestly. I kind of didn’t believe it would work. Zucchini doesn’t exactly scream “exciting” to begin with, and raw zucchini sounded like punishment dressed up as food.

I threw everything in the blender anyway — zucchini, a slice of bread, garlic, cherry vinegar, olive oil, ice cubes, herbs. Blended it. Tasted it.

Absolutely unreal. Fresh, deep, slightly grassy, perfectly seasoned. Cold like a dream. And completely vegan, no cooking involved, ten minutes start to finish. I had it twice that week. If you’ve got zucchinis to use and a heatwave to survive, this is your answer.

Zucchini Gazpacho – About the dish

Gazpacho is one of the great Spanish summer inventions — a cold, raw vegetable soup from Andalusia that has been around in some form since at least the 19th century. The classic version is tomato-based (with bread, garlic, vinegar, and olive oil as its backbone), and it remains one of the best arguments for not turning on the stove when it’s 35 degrees outside.

But the formula is more of a template than a fixed recipe. The real genius of gazpacho is the technique: raw vegetables, blended with bread (for body), vinegar (for brightness), olive oil (for richness), and ice or cold water (for temperature). The bread is non-negotiable — it’s what gives gazpacho its thick, slightly creamy texture instead of just being vegetable juice.

Zucchini works beautifully in this format. It blends smoothly, has a mild, clean flavour that lets the garlic, vinegar, and herbs shine, and — crucially — the skin stays on, which gives the soup a gorgeous pale green colour and keeps all the nutrients. The Maggi drops are optional but highly recommended: they add an umami depth that makes everything taste more complex than the ingredient list suggests.

Zucchini Gazpacho – Recipe

Ingredients – Advice & key points

  • Zucchini: Keep the skin on — don’t peel them. The skin gives the soup its green colour and blends completely smooth in a powerful blender. Medium-sized ones (around 600g total) are ideal; avoid oversized ones which can be watery and slightly bitter.
  • Bread: One slice of sandwich bread is all you need. It acts as an emulsifier and gives the gazpacho its body — without it, you’d have vegetable water. Don’t skip it, and don’t use too much or it’ll get starchy and thick.
  • Garlic: One large clove. Raw garlic in gazpacho is strong — taste as you go. If you’re garlic-sensitive, start with half a clove.
  • Sherry vinegar: This is what makes it sing. Sherry vinegar is fruity and slightly sweet — it lifts the whole soup without harsh acidity. If you can’t find it, a good quality white wine vinegar works fine.
  • Ice cubes: Three ice cubes go directly into the blender. They chill the soup instantly and help achieve that silky, perfectly cold consistency. Don’t skip them, or refrigerate the soup after making.
  • Maggi: Optional, but highly recommended. A few drops add umami depth and make the soup taste like it has a secret ingredient. Fine salt alone works too — just be sure to season generously, otherwise the whole thing falls flat.
  • Herbs: Basil and mint together is the move here. Basil adds depth and a slight anise note; mint keeps it cold and refreshing. Use both if you can.

Blending – Advice & key points

  • Use a powerful blender: This truly helps. A high-speed blender will give you a completely smooth, silky texture. A weak blender will leave bits of zucchini skin and bread — the soup will still taste good but the texture won’t be as satisfying.
  • Blend everything together: No need to blend in stages. Cut the zucchini into large chunks, quarter the onion, throw everything in at once and blend until completely smooth.
  • Adjust consistency with water: After blending, check the thickness. Too thick? Add a splash more cold water and blend again. The goal is a pourable, slightly creamy consistency — not a smoothie, not a thin broth.
  • Season properly — this is critical: Gazpacho is notoriously bland if under-seasoned. Taste after blending and adjust salt aggressively. If it tastes flat, it needs salt (or more Maggi). If it tastes one-dimensional, it needs a touch more vinegar.
  • Serve ice cold: Eat it right away, or refrigerate and serve within a few hours. It’s a cold soup — if it’s not properly cold, it loses half its charm.

Serve with grilled bread on the side — a slice or two of toast, rubbed with a little garlic if you’re into it. A soft-boiled egg, some good ham, or a slice of cheese alongside turns it into a proper lunch. Or eat it straight out of the blender cup standing in front of the open fridge. No judgement here.
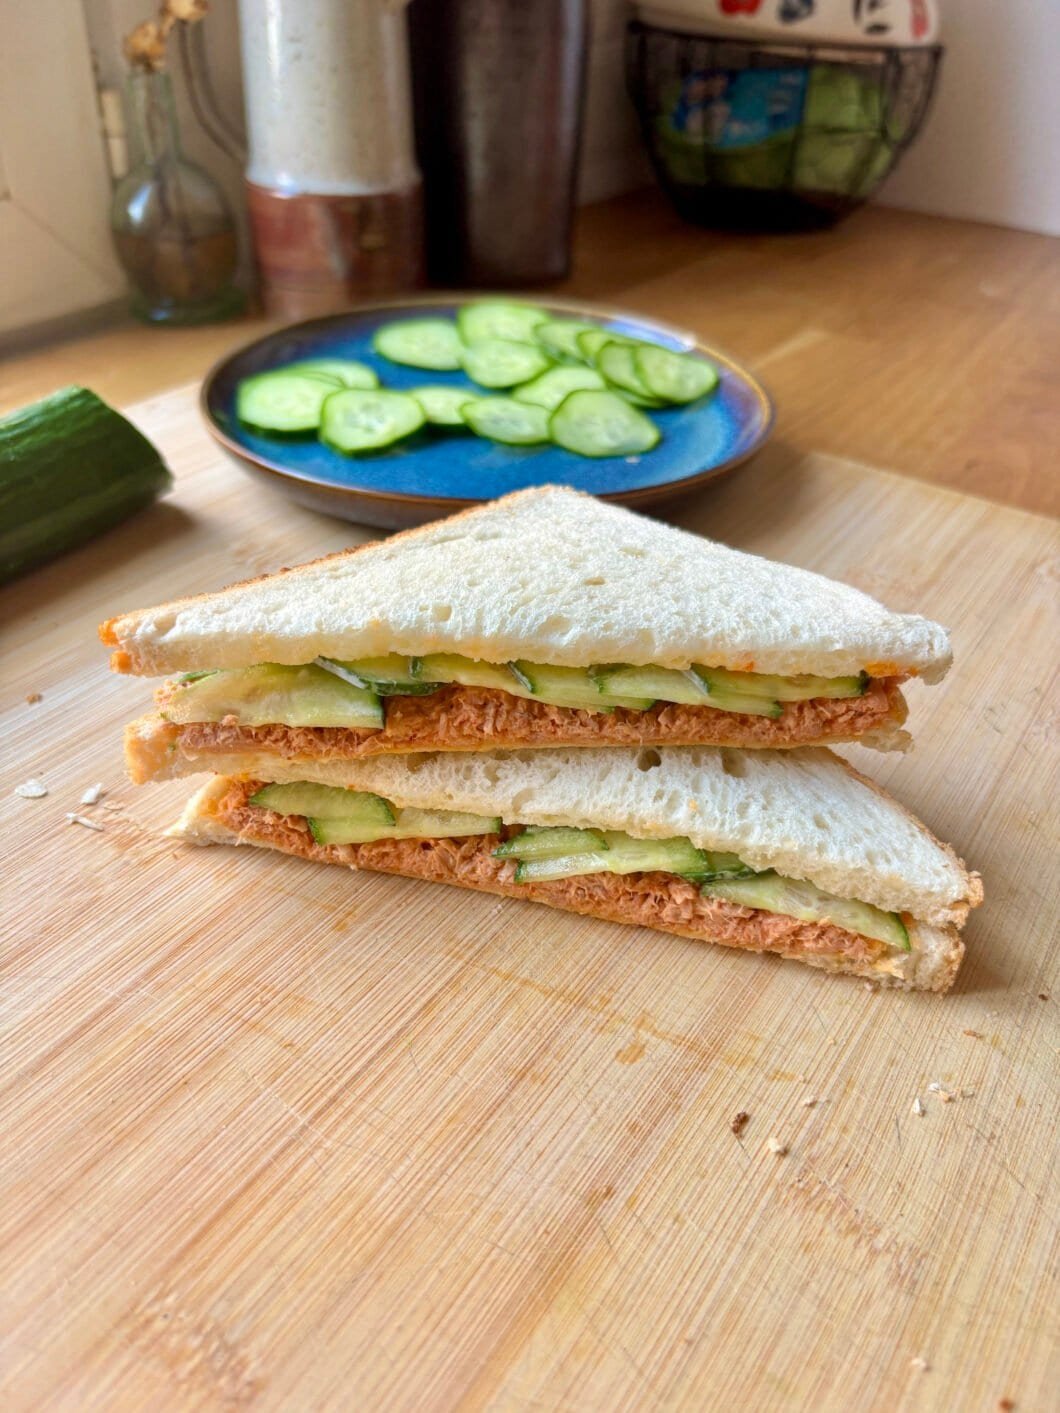
Express Tuna Gochujang Sandwich

It was 38 degrees outside. The kind of heat that makes cooking feel like a punishment.

I had a can of tuna, half a cucumber, and absolutely zero will to turn on the stove. I also had a box of gochujang sitting in the back of my fridge — the one I’d been using for jeyuk bokkeum, the one that makes everything it touches taste banging. And of course I had Kewpie mayo -a staple in this house.

I mixed them together, sliced the cucumber paper-thin, added a few drops of Maggi, and that was my lunch. Five minutes. Five ingredients. Done.

My sandwich savior. Not high cuisine no, definitely not pretending to be. But on a sweltering summer afternoon, this is exactly what the people need — and a slight upgrade on the basic tuna mayo.

Express Tuna Gochujang Sandwich – About the dish

The tuna sandwich is one of those things that exists in every culture, in some form. Universally humble, universally satisfying. What makes this one interesting isn’t the format — it’s the sauce.

Gochujang (고추장) is a fermented Korean chili paste made from glutinous rice, red chili powder, fermented soybeans, and salt. Unlike raw chili heat, gochujang brings something deeper: a slow, building warmth with a faint sweetness and umami backbone from the fermentation. It’s what makes Korean food taste distinctly Korean — not just spicy, but complex.

Combined with a good mayonnaise — ideally Kewpie, which uses rice vinegar and egg yolks only (no whites), giving it a richer, tangier flavour than Western mayo — it becomes something that feels far more sophisticated than the two-second effort it takes to mix together. The cucumber adds the crunch and the cool. The Maggi (or fine salt) just sharpens everything.

This is the kind of sandwich you make when tomato-cucumber salads feel like a broken record. Same summer vibes, but with SPICE.

Express Tuna Gochujang Sandwich – Recipe

Ingredients – Advice & key points

  • Tuna: Use tuna in water (or oil if you can spare the extra calories!), and don’t drain it fully — a little of that liquid loosens the mix perfectly and keeps it moist. 200g is the sweet spot for 2 sandwiches.
  • Mayonnaise: Kewpie is recommended here. It’s richer, slightly tangier, and more flavourful than standard mayo. You’ll find it at any Asian grocery or online. If you can’t find it though, any full-fat mayo works.
  • Gochujang: 2 teaspoons gives a noticeable but very chill heat. If you’re heat-sensitive, start with 1 tsp and taste as you go. If you love fire, go up to 3. Every brand varies in spice level, so adjust accordingly.
  • Cucumber: Slice it as thin as possible — this isn’t a sandwich filler, it’s a contrast element. Thin slices give you crunch without bulk, and they don’t make your bread soggy.
  • Maggi vs. salt: Maggi seasoning sauce adds a deeper umami hit than plain salt. If you have it, use it. If not, fine salt works fine.
  • Bread: Standard sandwich bread works perfectly here. I prefer mine untoasted for this one -I love a soft, moist tuna sandwich- but up to you!

Assembly – Advice & key points

  • Mix the tuna well: Make sure the gochujang and mayo are fully incorporated into the tuna — no orange pockets of unmixed paste. Taste and adjust before spreading.
  • Cucumber goes on top: Spread the tuna mix first, then layer the cucumber slices on top. This way the cucumber stays crisp and doesn’t make the bread soggy from the bottom.
  • Add the Maggi/salt last: A few drops directly on the cucumber slices, right before closing the sandwich, gives you a final sharp savoury note that ties everything together.
  • Eat it right away: This sandwich doesn’t hold well. The cucumber releases water over time, which softens the bread. Make it, eat it. No meal prep here.

That’s genuinely everything. No stove. No waiting. Just a bowl, a knife, and five minutes between you and something that tastes like it has no right to be this good.

Enjoy !

Thai Steak & Egg

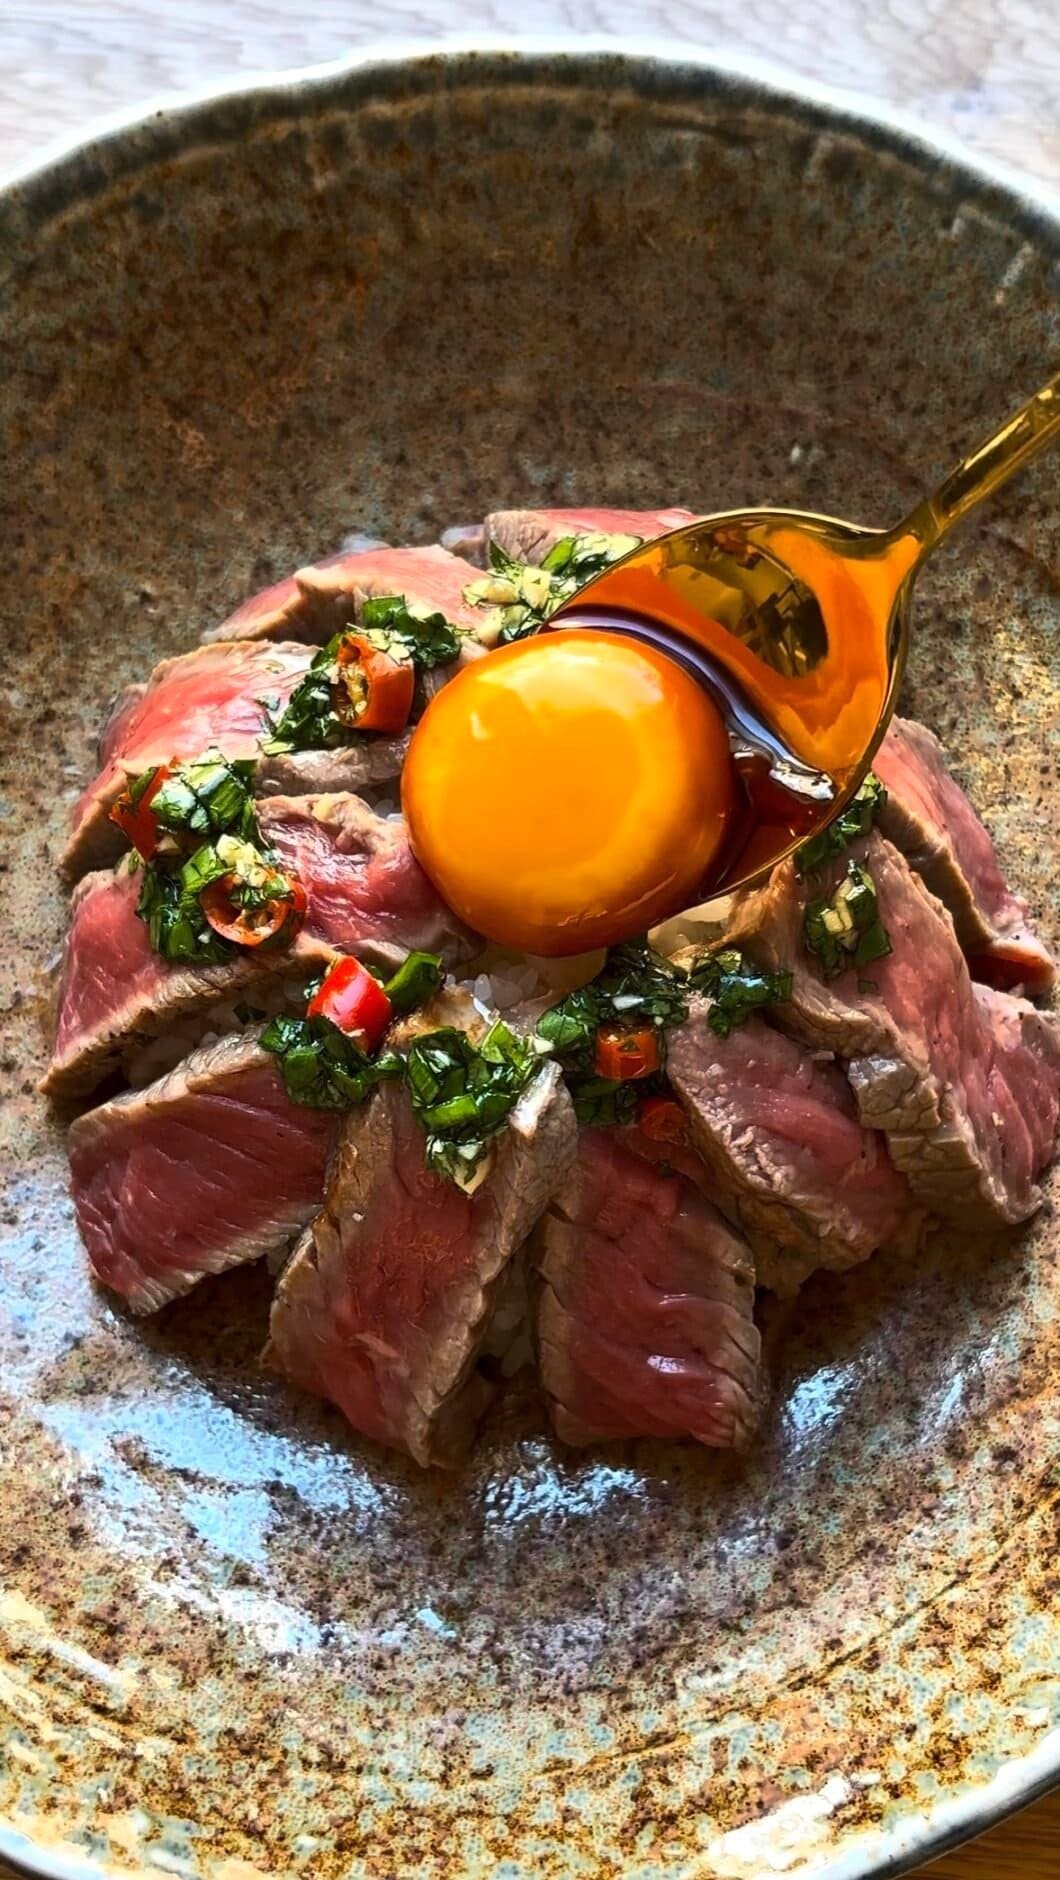
It started with a video. Someone I follow posted a reel of a vendor slicing a hunk of grilled beef so slowly and deliberately that you could almost feel the heat coming off the pan. She drizzled a bright green herb sauce over it, placed a single raw egg yolk on top, and that was it. Twenty seconds. No voiceover. No recipe. Just vibes.

I watched it six times. Then off to the kitchen I went.

The result wasn’t exactly what she made, but the video inspired me in a few ways that mattered to me. The Thai chimichurri I built around it ended up being something I’d put on almost anything : punchy with fish sauce, electric from the chilis, grounded by palm sugar and neutral oil. And the soy-marinated egg yolk sitting right in the center of the bowl, slowly running into the rice and the beef as you break it — this is comfort food to me, in its highest shape and form.

This bowl is the kind of thing that looks intimidating but is really just smart assembly. The beef is seared, the sauce is blended, the yolks are marinated. Everything meets in a bowl and something greater than the sum of its parts happens.

Thai Steak & Egg – About the dish

This bowl draws from a very specific Thai tradition : the idea that grilled or seared meat (often called neua yang — literally “grilled beef”) served with a punchy herb-and-chili sauce is one of the great combinations in the cuisine. You’ll find versions of it from street stalls in Chiang Mai to upscale restaurants in Bangkok, always resting on rice, always with something sharp and acidic to cut the richness of the meat.

The sauce here is essentially a Thai chimichurri — a loose herb-and-chili condiment built on fish sauce, lime, garlic, coriander, and Chinese chives, sweetened slightly with palm sugar and emulsified with neutral oil. It has no exact canonical name because it’s more of a template than a fixed dish : every cook makes it differently. Think of it as the Thai answer to salsa verde or Argentine chimichurri — herby, bright, and completely alive.

The marinated egg yolk is the kind of thing that feels like a trick but is just patience. Soy sauce, 6 hours. The sweet spot is real: at exactly 6 hours, the yolk is barely set at the surface, still completely runny at the center, and it carries a deep savouriness that makes it taste like something far more complex than two ingredients. But under 6 hours is fine, too! I just wouldn’t advise to go beyond 12 hours, as the yolk will be a bit too firm for what we’re aiming here.

The beef wants to be good. This isn’t a dish where you hide average meat behind sauce — the chimichurri is a complement, not a cover. A well-marbled entrecôte or a good faux-filet, possibly dry-aged if you can find it, will be perfect here. Sear it hard, rest it properly, slice it against the grain. That’s all the technique there is.

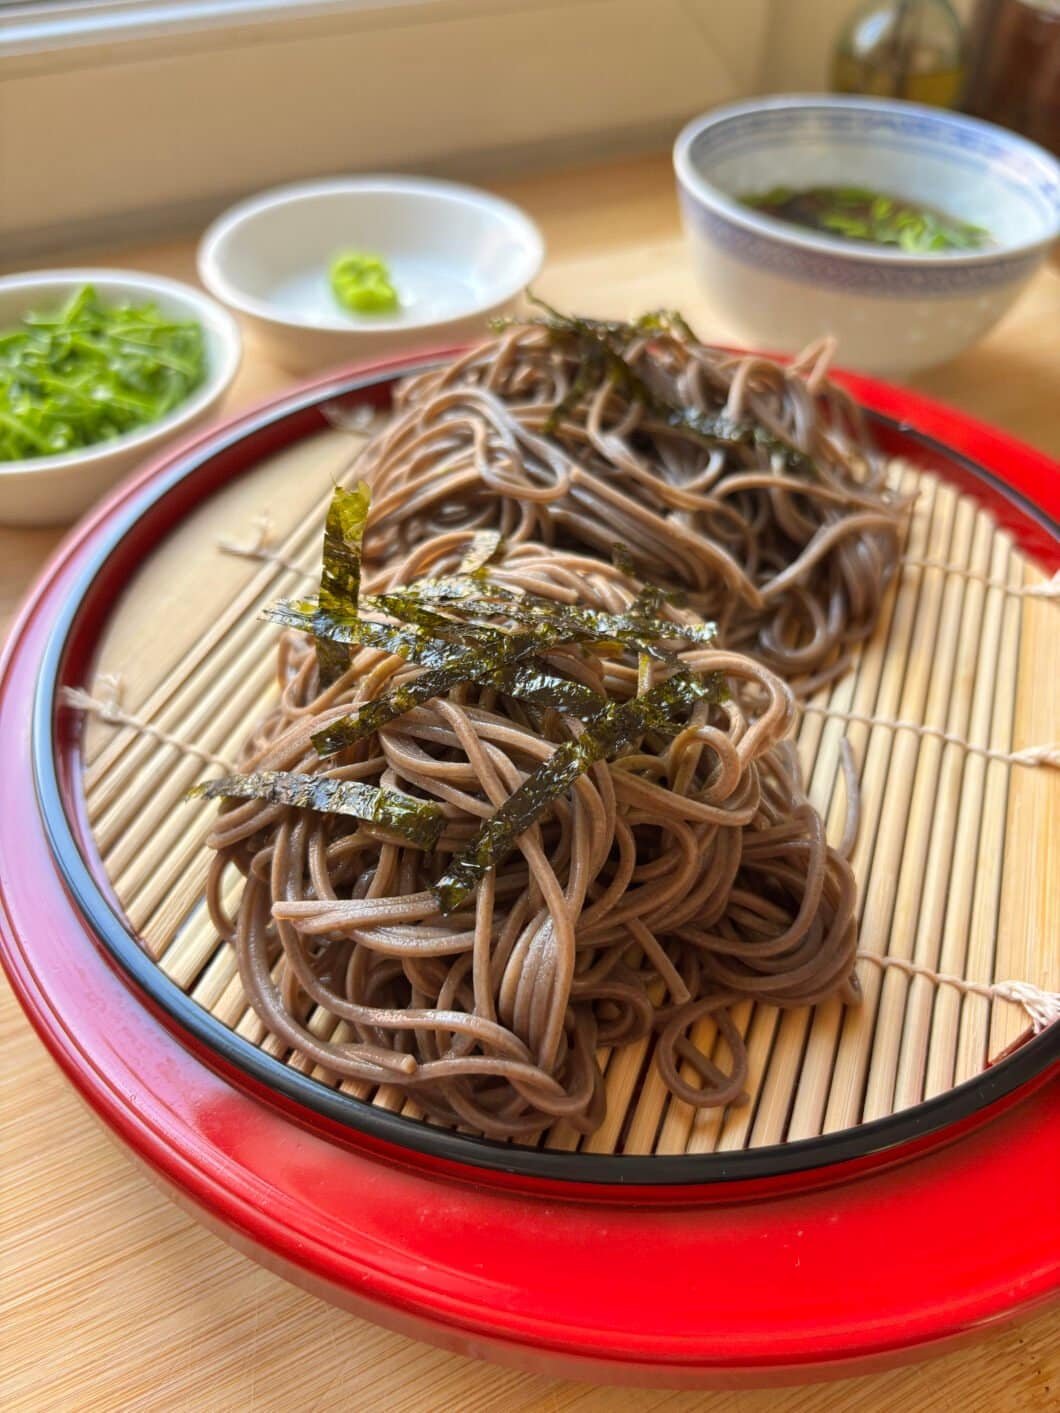
Easy Zaru Soba

I remember the first time I made zaru soba. I never went to Japan, but as always, I researched my topic obsessively.

I found soba noodles at my Asian grocery store, grabbed some mentsuyu from the shelf — the concentrated kind, in a little bottle — and went home feeling very smug about myself. 10 minutes later, lunch was served.

It instantly became one of my all-time favourite summer lunches. It requires zero motivation nor cooking skill, and somehow tastes incredibly elegant. The cold noodles are nutty and satisfying, the dipping sauce is deeply savoury and a little sweet, and the whole thing is just… refreshing in a way that a big bowl of hot pasta simply cannot be when it’s 30 degrees outside.

A bit of context

Soba (そば) are Japanese buckwheat noodles. The word itself means “buckwheat” in Japanese. They have been eaten in Japan since at least the Edo period (17th century), making them one of the country’s oldest and most beloved noodle traditions.

Zaru soba (ざるそば) is the cold preparation — noodles chilled on a bamboo draining basket (the zaru), served with a dipping sauce called tsuyu or mentsuyu. It is the quintessential summer dish in Japan : light, quick, and refreshing. You will find it everywhere, from convenience stores to high-end soba restaurants where a chef has spent years perfecting hand-cut buckwheat noodles.

Mentsuyu is the key component here. It is a concentrated dipping sauce made from dashi (Japanese fish and seaweed stock), soy sauce, mirin and sake. You can make it from scratch, but the bottled version — sold in most Asian grocery stores — is genuinely excellent, and exactly what most Japanese households use at home. This is not a shortcut, it is just smart cooking.

Easy Zaru Soba – The steps to eat them

Before we get to the recipe, a quick guide on how to eat zaru soba — because getting it wrong (as I did) completely ruins the experience.

1. Don’t pour the sauce

This is dipping noodles, not noodle soup. The mentsuyu goes into a separate cup. The noodles go on a plate. Those are two distinct things and they stay separate until you eat them.

2. Add scallions in the sauce

Not on the noodles ❌ — into the dipping sauce ✅. Add a small amount at a time. Don’t dump everything in at once.

3. Add wasabi bit by bit

Same logic : add a tiny amount of wasabi directly onto your chopsticks before grabbing and dipping your soba noodles. It should add heat and depth, not blow your head off.

4. Dip, don’t soak

Pick up a small bundle of noodles → quick dip into the sauce → eat. The goal is a light coating, not drowning the noodles. A light dip = balanced flavour. Drowning them = too salty + the nutty flavour of the soba itself gets lost.

5. Slurp (yes, really)

It’s not rude. In Japan it is considered a sign that you are enjoying your meal. More practically : slurping cools the noodles as you eat them and, apparently, also enhances the flavour. Don’t be shy.

6. The final step (most people don’t know)

👉 If you have it : sobayu — the hot cooking water from your noodles. Once you’re done eating, pour it into your leftover sauce and drink it like a light broth. It is slightly starchy, warm, and absolutely delicious. Japanese soba restaurants always bring it to you at the end of the meal. Don’t skip it.

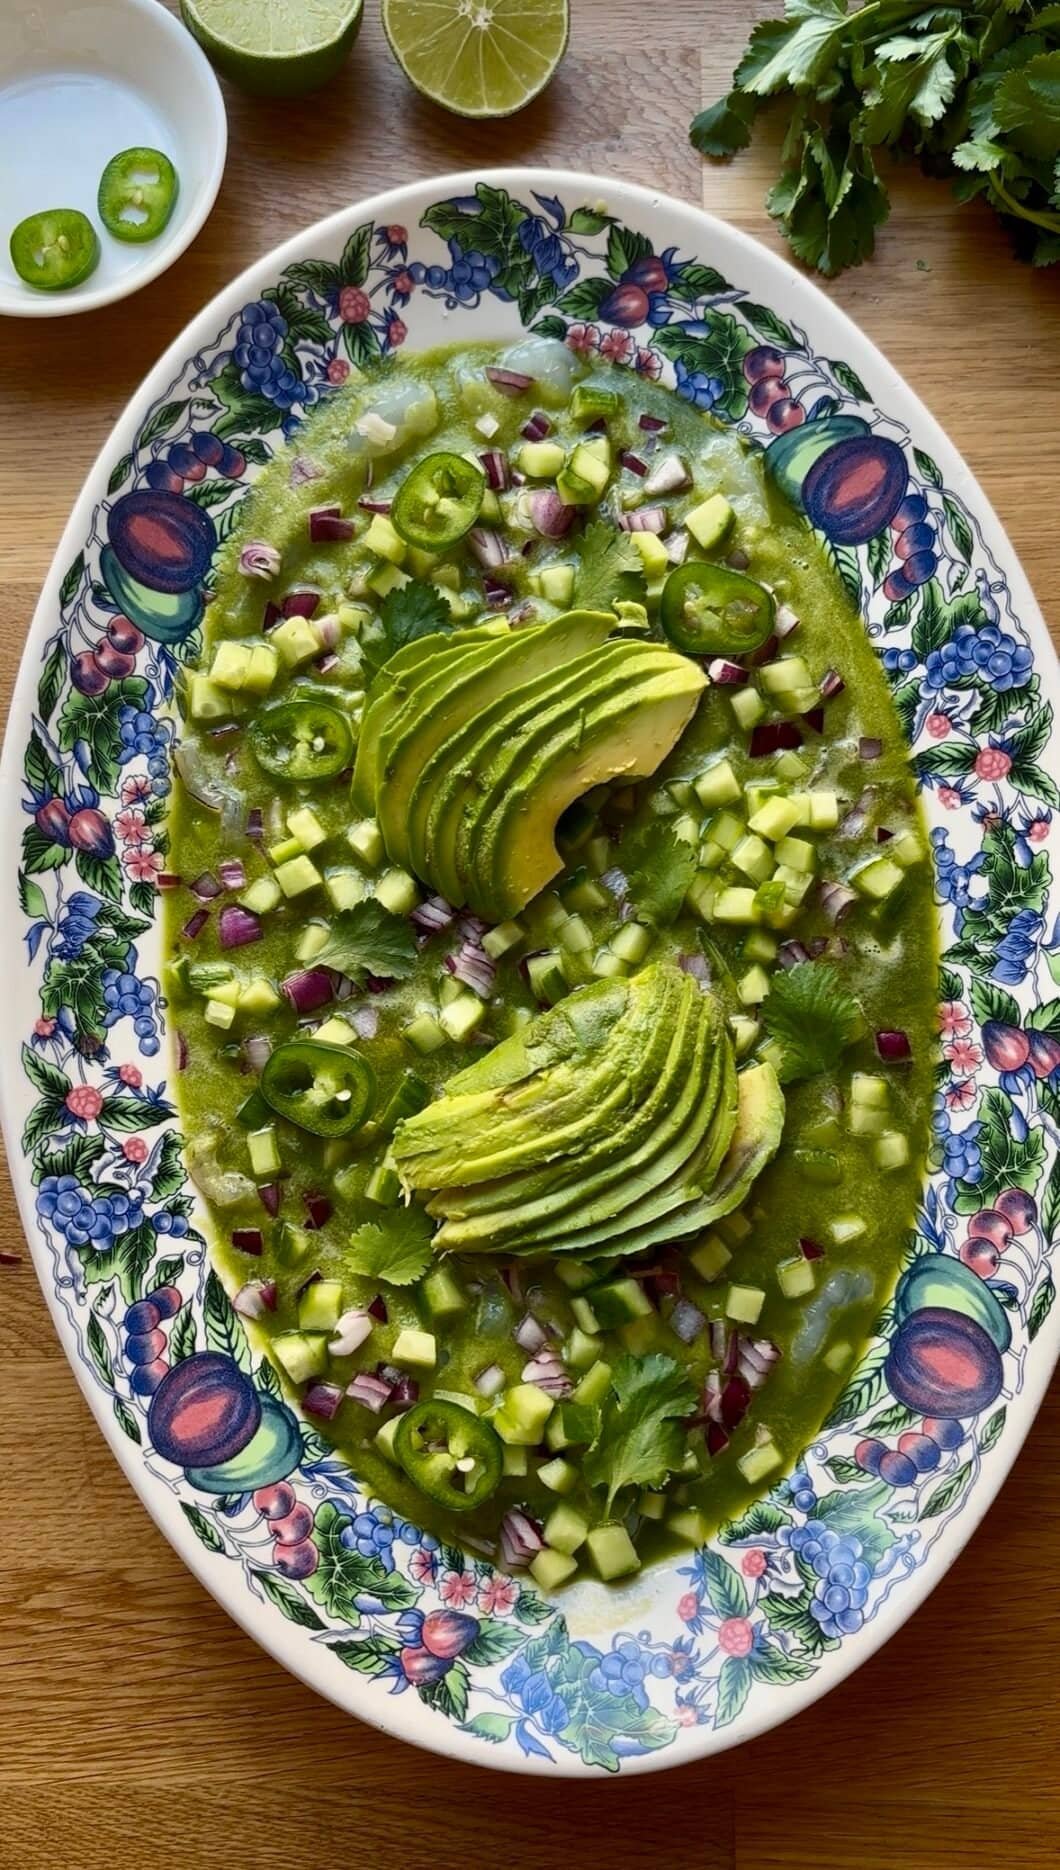
Aguachile Verde

I remember the first time I had a proper aguachile. It was in Islas Mujeres, Mexico. I had been warned : “it’s basically raw shrimp marinated in lime juice.” And I almost passed. Almost. Then I took one bite, and I sat very still for a moment, because I did not know food could do that. Bright, electric, fiery, cold. Every bite was like a slap you kind of want again. I went home obsessed. That was it for me.

The thing about aguachile is that it is deceptively simple. There is no real cooking involved. The shrimp “cooks” in lime juice — a process called denaturation, where the acid changes the protein structure much like heat would. The result is shrimp that turns opaque and tender, still with that slight bounce of rawness. Do not let this scare you : it is perfectly safe, as long as you use very fresh shrimp (more on that below).

Aguachile (which literally means “chili water” in Spanish) is a dish from the northwestern state of Sinaloa, Mexico. It is closely related to ceviche, but unlike ceviche — which typically marinates for longer and uses a mix of citrus — aguachile is meant to be served and eaten immediately. The shrimp barely “cooks” : two to five minutes in the sauce, and you are done. The sauce itself is blitzed raw : lime juice, green chili, cucumber, cilantro, garlic, and a cube of ice to keep everything vibrant and cold. In Mexico, it is often finished with drops of Maggi seasoning, which adds a deep savory note that you will not expect but absolutely need.

Traditionally, aguachile verde uses serrano or jalapeño chilies for a clean, grassy heat. I used large green chilies (the kind you find easily in French supermarkets) and it worked beautifully — milder, but still very much alive. Serve it with tostadas, or tortilla chips if that is what you have on hand. The contrast between the cold, acidic shrimp and the crispy tostada is the whole point.

One very important note : this dish needs to be eaten immediately. Do not make it in advance. The lime juice will keep working on the shrimp and you will lose that perfect just-right texture. Make the sauce, prep your garnish, butterfly the shrimp — then pour and eat. That is the deal.

Also, a tip to make tostadas quickly : Simply fry each tacos (tacos de maiz) 30 seconds per side in a hot pan with 1cm neutral oil. When it’s slightly colored & crispy, remove!

Or simply enjoy with tortilla chips. During heatwaves, it’s pure bliss.

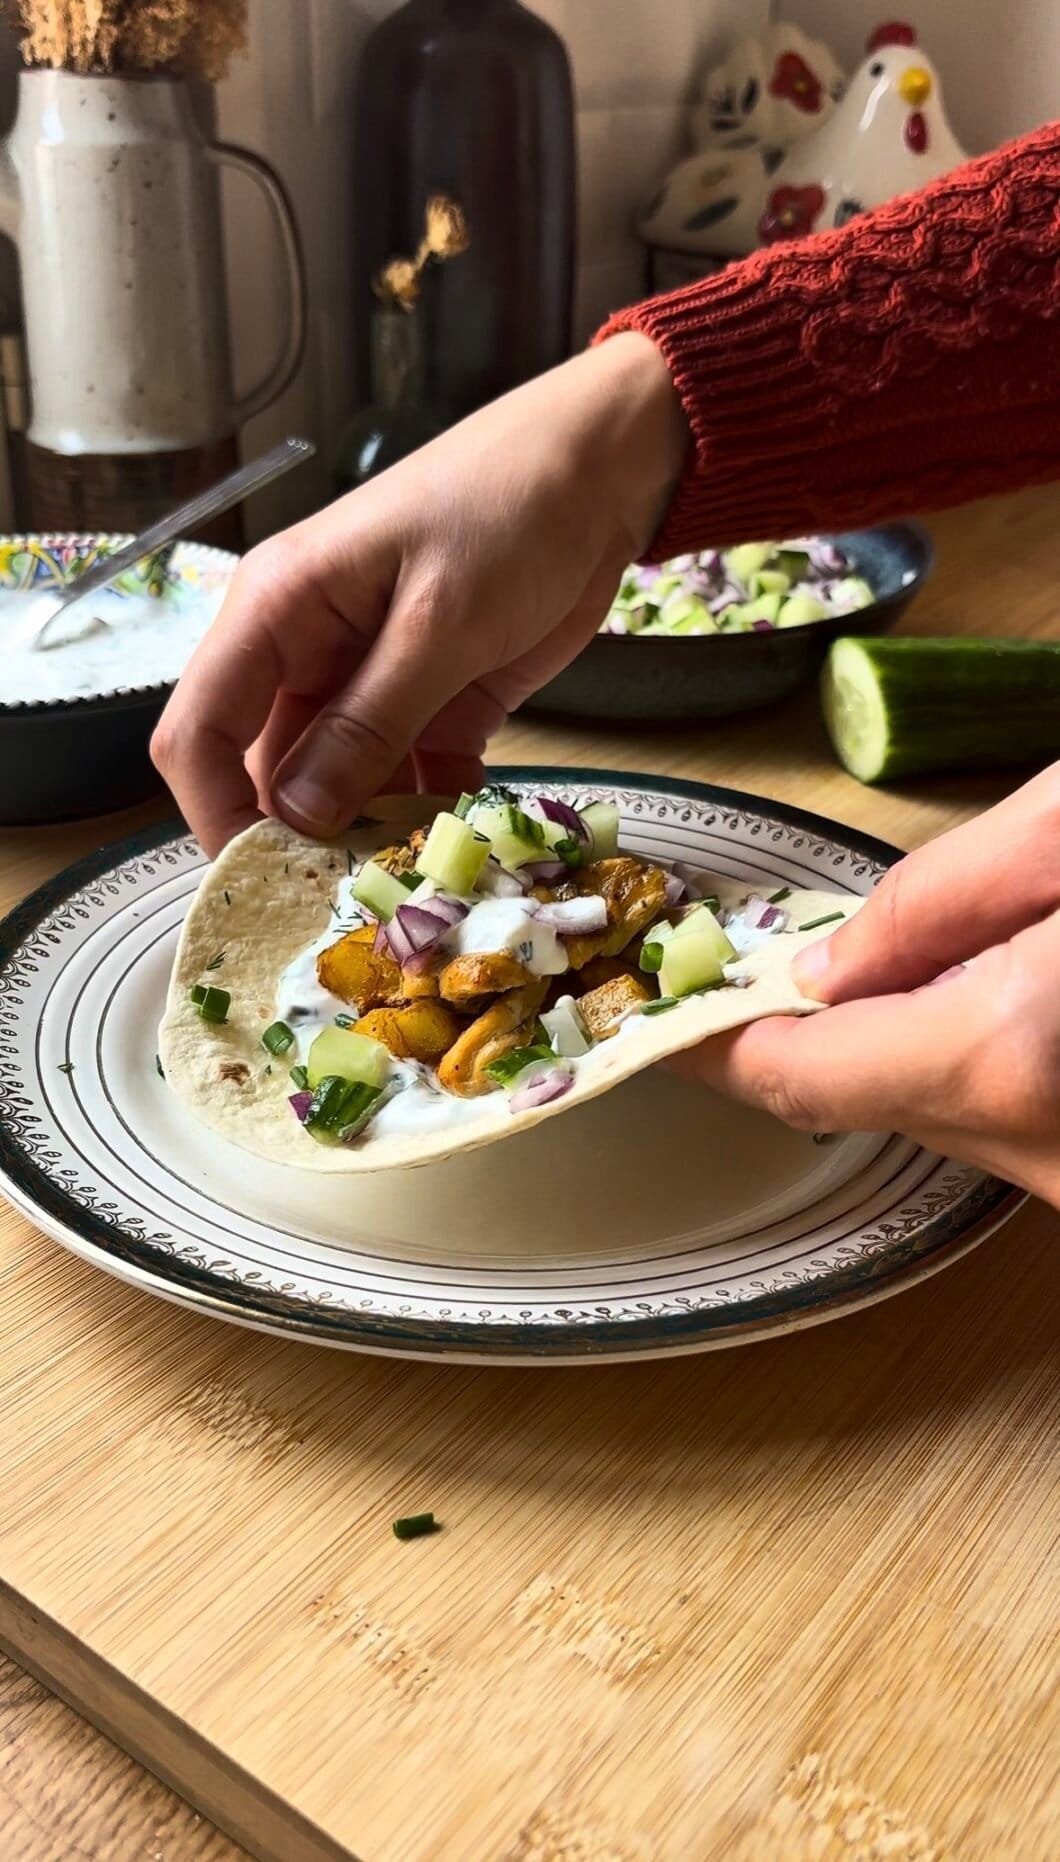
Gyros Tacos

I have a thing for fusion food. Not the kind of vague, “we put avocado on it, that counts” fusion — I mean the real deal, the kind where two completely different food cultures clash and somehow produce something that feels inevitable. Greek meets Mexican. Gyros meets tacos. Yes.

It all started one evening when I had a craving for gyros — that herby, garlicky marinated chicken — but I was too lazy to make pita bread. (Let’s be honest, I’m always too lazy to make pita bread.) I had a pack of wheat tortillas sitting in my cupboard. And then it happened. The lightbulb moment. What if I just… swapped the pita for a tortilla ?

Reader, I did it. And I have not looked back since.

The result is honestly one of my favourite weeknight dinners now. The chicken is marinated overnight -or just 30 minutes- in a proper Greek-style marinade with dried oregano, garlic, lemon juice, yogurt and a touch of cumin. While it cooks in the air fryer or oven, you make a quick tzatziki-style sauce and cut up your crudités. Then you pile everything onto a warm tortilla and go to town.

The air fryer potatoes deserve a mention too. I know, potatoes in tacos might sound weird — but this is a Greek taco, my friend, and Greeks love their potatoes. Crispy on the outside, fluffy on the inside, seasoned with paprika and a touch of cornstarch to get that extra crunch. They’re honestly the best part of the whole thing. (Don’t tell the chicken I said that.)

Gyros Tacos – A bit of context

Gyros (pronounced YEE-ros, not JY-ros, though I won’t judge you) is one of Greece’s most beloved street foods. The word comes from the Greek γύρος, meaning “circle” or “turn” — a reference to the rotating vertical spit on which the meat is traditionally cooked. It’s thought to have been inspired by the Turkish döner kebab and the Arab shawarma, and all three share the same DNA : marinated meat, slow-cooked, thinly sliced, served in a bread with sauce and vegetables.

The Greek version is typically made with pork or chicken, seasoned generously with oregano (non-negotiable — Greek dried oregano is really something special, don’t use Italian oregano here if you can avoid it), garlic, and lemon. It’s served in a pita with tzatziki, tomatoes, onion, and sometimes fries tucked inside. Yes. Fries. Inside the wrap. The Greeks understood the assignment long before anyone else did.

My version keeps all the flavours faithful to the original — the marinade is as Greek as it gets — but swaps the pita for a tortilla and reshapes the whole thing as a taco. It’s a weeknight-friendly, air fryer-powered, absolutely delicious adaptation that I’m genuinely proud of. Give it a shot !

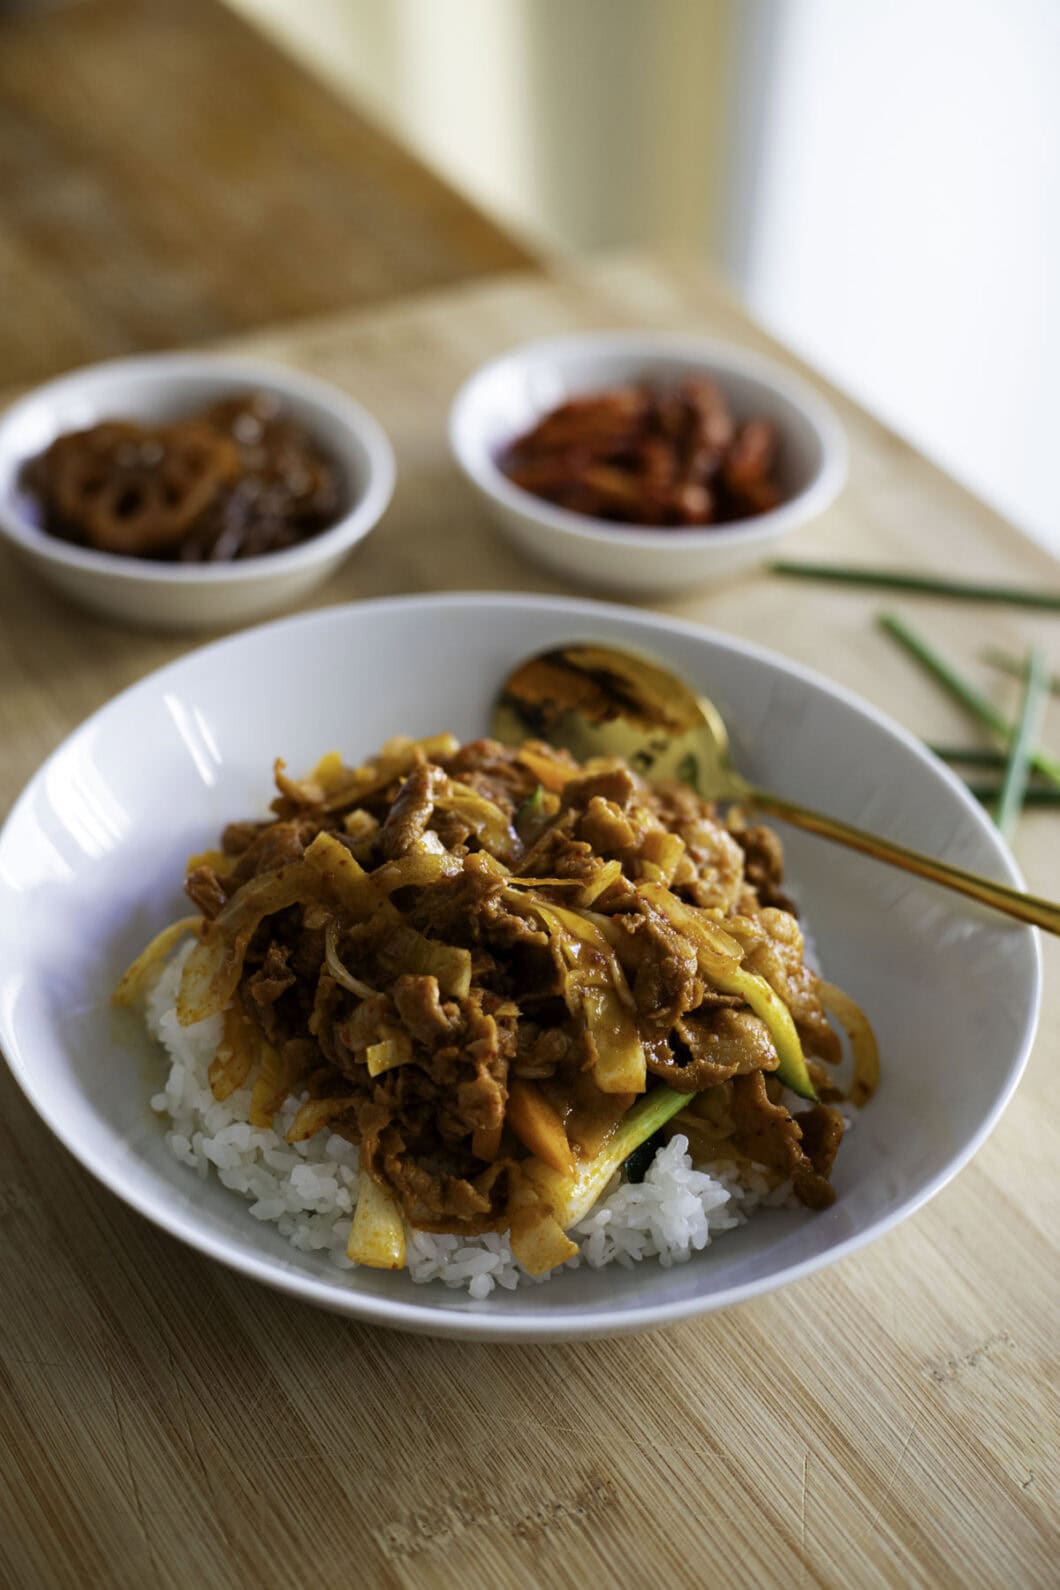
Jeyuk bokkeum (Korean Spicy Pork)

My, my. Just thinking of this dish makes my mouth water !

Jeyuk bokkeum is my companion’s absolute favourite in Korean restaurants -and it would be mine if not for Kimchi Jigae. It consists in very thinly sliced pork marinated in a beautiful, bright red sauce, and served with rice. It is as simple as it is tasty.

This version is a pan-fried one, where I add veggies ; along with the meat, they release all their delicious juices, resulting in a tasty red sauce that drips over your rice. However, you could also prepare this dish barbecue-style if you own a table barbecue, for a smokier taste ; if so, you shouldn’t include veggies, or very little, as they’d release too much moisture. I’ll make a barbecue version someday !

All the flavours come from the rather simple Gochujang (red pepper paste) and Gochugaru (red pepper flakes) marinade. Don’t forget to add loads of garlic, and to balance this savoury sauce with a bit of sugar  The sesame oil also makes a world of difference. In the end, you get a spicy, savoury, sweet, tangy sauce full of depth ; thanks to the vegetables, some delicate vegetal flavours offset the meaty ones.

Besides, as the meat is paper-thin, you only need to marinate it around 30 minutes. This dish is definitely a weeknight one -provided you’re OK with spending a small hour in the kitchen. I guarantee anyone who can take a bit of heat will ask for seconds.

Bon appétit !

Jeyuk bokkeum (Korean Spicy Pork) – Recipe

Ingredients – Advice & key points

  • Pork:
    • I like to either use only pork belly, or a mix of pork belly, with its delicious fatiness, bringing in lots of flavour, and pork shoulder, which is leaner, for a meatier texture. Pick one or both depending on your personal preference and your meat availability !
    • You can buy your pork pre-sliced at the fresh or frozen section of your Asian grocery store, if the store is large enough.
    • If you cannot find it, it’s ok ; you can easily slice the meat paper-thin at home ! You will only need to freeze your cut around 1 hour (maybe more, depending on its size) to make it easier to cut. It should be quite solid, but not rock-solid. I often do this even if I can get frozen pre-sliced meat, simply because it is easier for me to check the meat’s quality when I buy it from by butcher.
  • I find it important to cut your meat paper-thin ; the texture is more pleasant, as well as the taste, which might be a tad too bold with large pieces.
  • The remaining ingredients are either basic Asian pantry items or produce you can easily find at the grocery store.
  • This dish is spicy, but not crazy spicy. If you want to lower the heat, reduce the Gochugaru amount -or even remove it altogether.

How to eat Korean Spicy Pork

  • You can eat it like on the picture, over a bowl of rice, or with rice on the side. I like to pour the pork over the rice so get all the delicious juices directly on top of my rice.
  • You can also, of course, wrap your pork in lettuce leaves, with some rice, Ssamjang and a bit of kimchi !

If you enjoy Asian rice bowls, check out this Teriyaki Don, this Mushroom Donburi, this Miso Eggplant Butadon, or my Vietnamese Oyakodon !

Let’s dig into it !

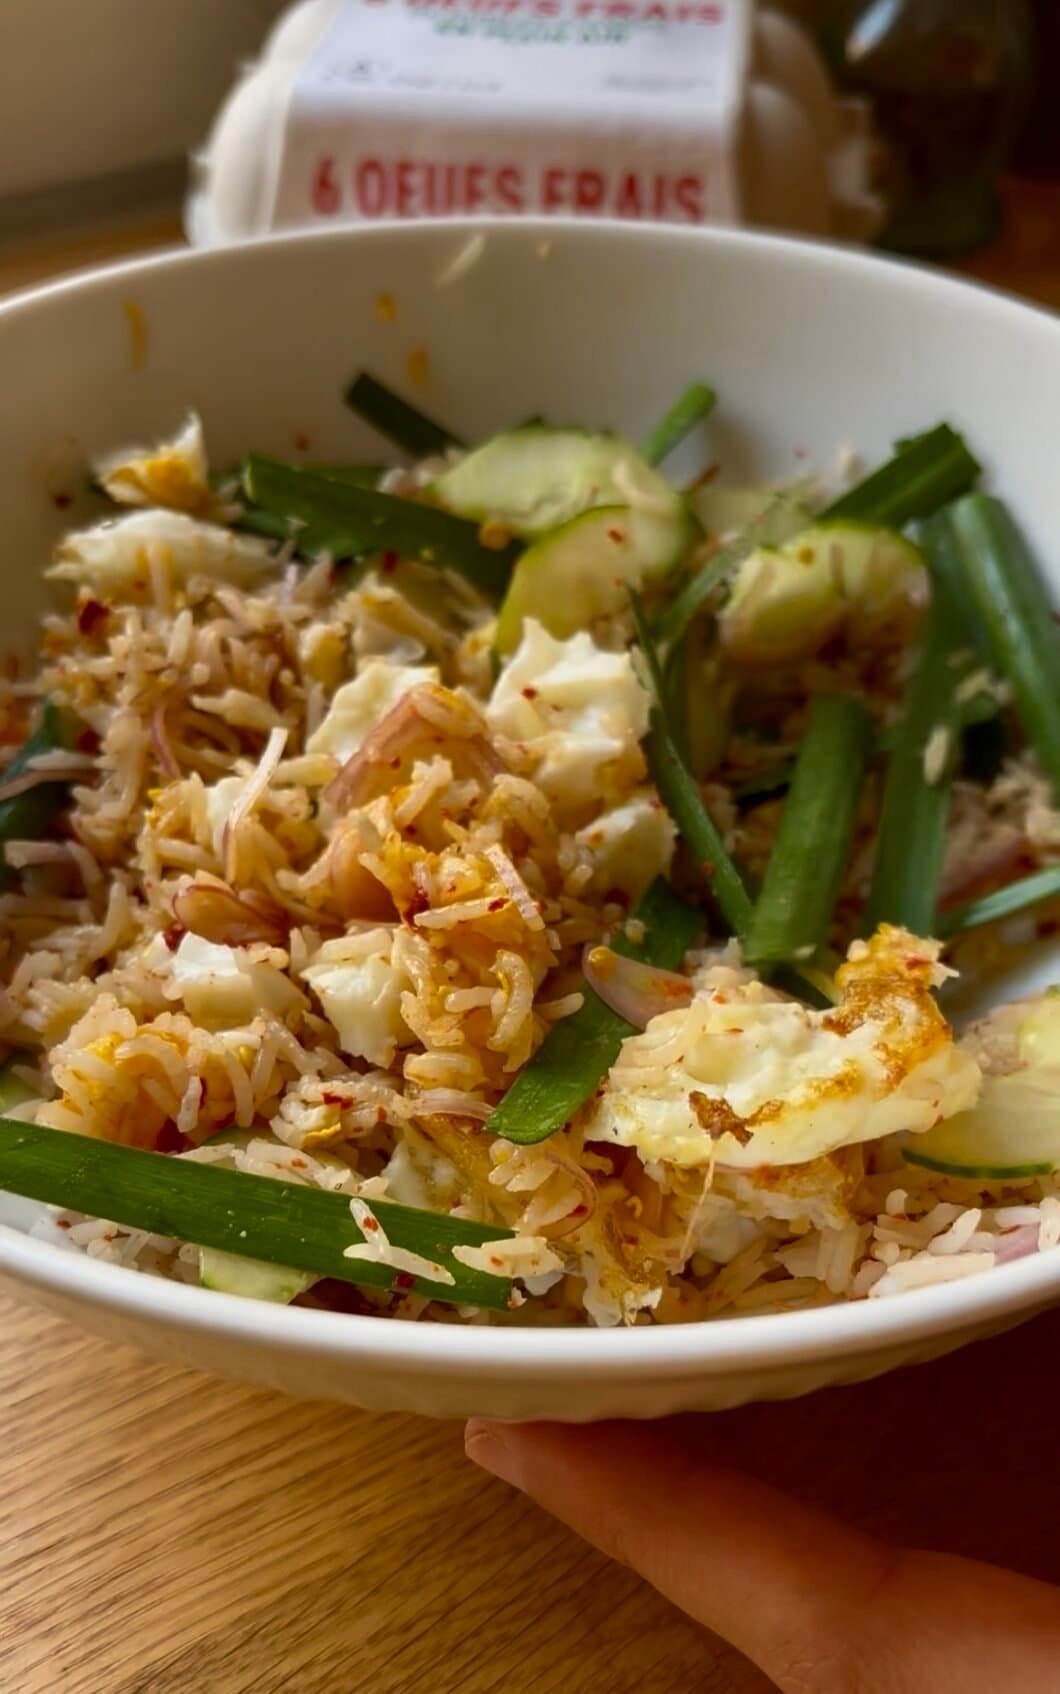
Thai Egg & Rice (Khao Khluk Nam Pla)

There’s a very specific kind of morning that produces this bowl.

I was in Chiang Mai, staying in a guesthouse somewhere off the old city moat. It was 7am, the kind of light that’s still soft and almost orange. I’d walked past the same rice shop three mornings in a row without stopping, which is embarrassing in retrospect, because on the fourth morning I finally sat down on one of the plastic stools and watched the woman at the wok for a full two minutes before I even looked at the menu. She cracked two eggs into a small pool of oil, pressed the whites slightly into the pan with a spoon so the edges went golden and lace-like, left the yolk completely runny, and then placed them over a bowl of plain jasmine rice she’d already dressed with fish sauce, raw shallot, and lime juice.

She put the bowl in front of me, dropped a few pinches of smoked chili flakes on top, slid a plate of sliced cucumber across the counter, and walked away.

I sat there for a second wondering if something else was coming. Nothing was coming. This was it. And it was one of the best things I ate in Thailand.

The bowl costs almost nothing. It takes less than ten minutes. And every single element does exactly what it’s supposed to do — which is the whole point.

Khao Khluk Nam Pla – Thailand’s Simplest Perfect Bowl

The name translates almost literally to what it is: khao (rice) + khluk (to mix) + nam pla (fish sauce). It’s not a recipe in the way most dishes are — it’s more of a technique, a ratio, a philosophy. You season your rice directly, in the bowl, and the mixing itself (the khluk) is part of the cooking process.

This is quintessential Thai home food and street breakfast food — the kind of thing eaten at plastic-stool shops at dawn, before the tourist food wakes up. It’s in the same family as rice dishes that use fermented fish sauce as the primary seasoning – deeply savoury, slightly pungent, beautifully bright from the lime. The shallots are always raw (this is non-negotiable, as you’ll see below), the chili flakes add warmth and smoke, and the cucumber provides the cool crunch that makes the whole thing feel complete.

The eggs are traditionally fried Thai-style – cooked in more oil than you’d think necessary, edges crispy and almost frilly, yolk still liquid. The slight bitterness of the lacy fried white against the runny, rich yolk is genuinely the best possible egg preparation for this bowl. It’s not health food. It’s egg perfection.

An important note on the fermented fish sauce : this bowl calls for a thick, gray fermented fish sauce. You can order it online (I did) or find it in a Thai produce store.

Also, authentic Thai chili flakes are often lightly smoked or toasted, which gives them a depth that regular dried chili flakes don’t quite have. If you can find them at an Asian grocery, use them. If not, a mix of regular chili flakes with a very small pinch of smoked paprika gets you most of the way there.

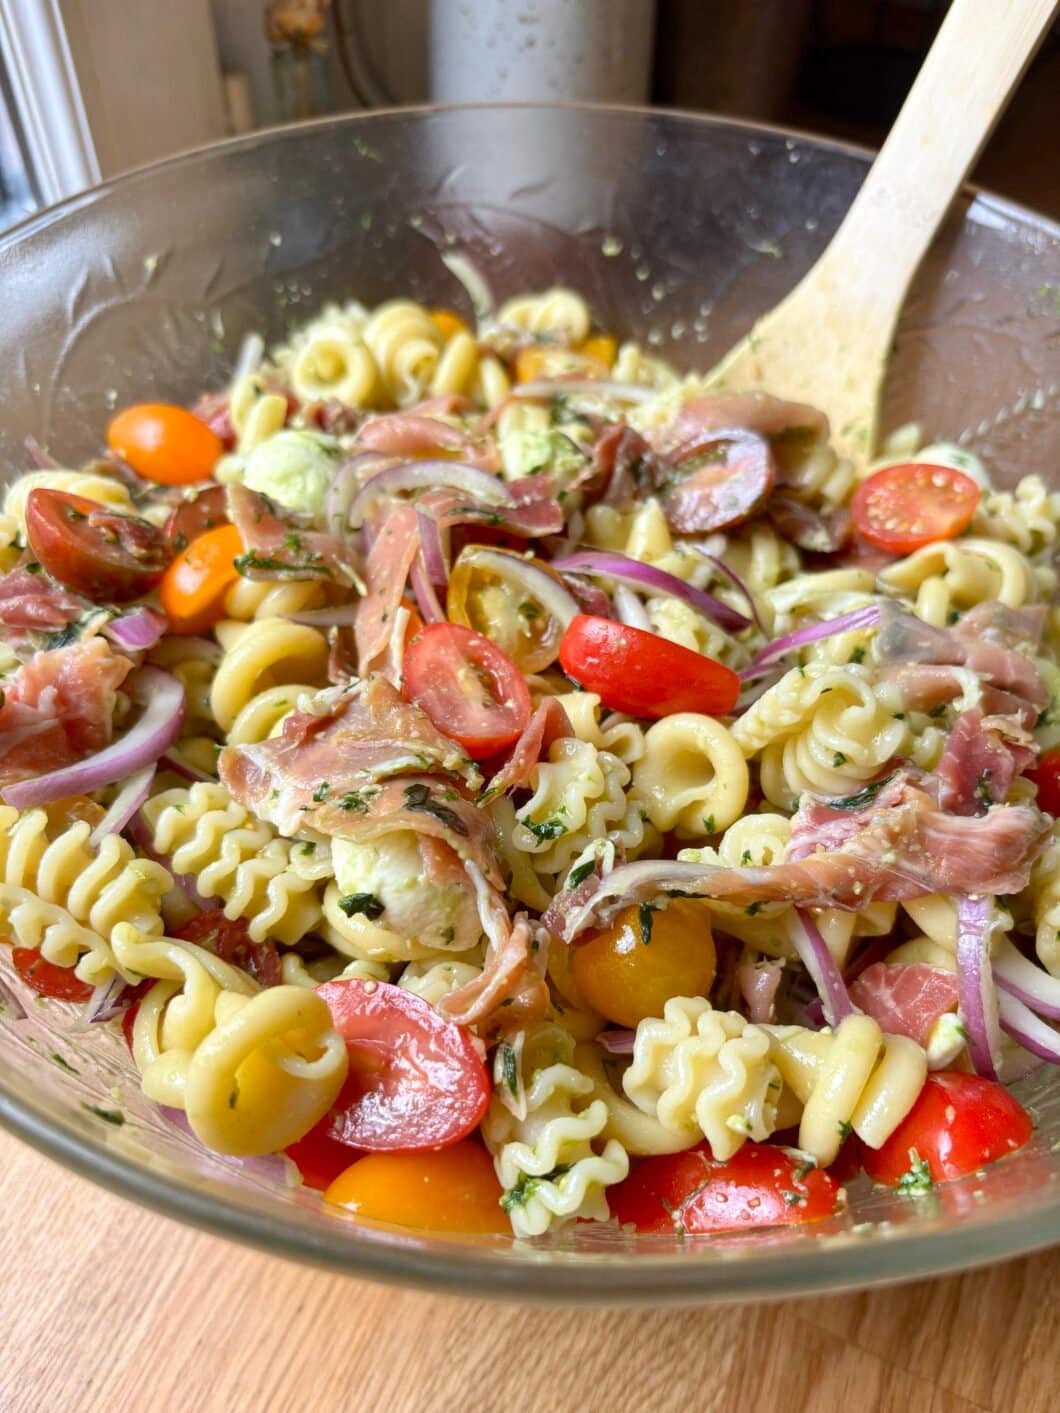
Pesto Pasta Salad

I made this for the first time at the end of a long July, when it was too hot to actually cook anything properly and I had a bunch of cherry tomatoes on the counter that were this close to becoming a problem.

I’d had pesto pasta a thousand times, but cold — as a salad — somehow felt different. More summery. More honest. I threw in what was in the fridge : some raw ham I’d been meaning to use up, a ball of mini mozzarellas, half a red onion. Twenty minutes later, it was the best thing I’d eaten all week. My flatmate ate two bowls and asked me to make it again immediately.

There’s a very specific trick that makes this work though, and I’ll tell you about it in a second — because without it, your pesto will end up sitting in sad little clumps all over your pasta, refusing to cooperate. We’ve all been there.

Pesto Pasta Salad — What You Need to Know

Pasta salad is one of those dishes that looks dead simple but is full of potential pitfalls. The biggest one with pesto ? Pesto hates cold pasta. If you toss it in straight from the jar (or even straight from the mortar), it clumps. The oil seizes. You end up with pesto nuggets instead of an evenly coated salad.

The fix is embarrassingly easy : pasta water. Keep a few tablespoons of starchy cooking water before you drain your pasta, and mix it into your pesto before dressing the salad. The starch emulsifies with the oil and turns the whole thing into a smooth, glossy sauce that coats every single piece. This is the same technique as hot pesto pasta — it just works cold too.

The other thing worth mentioning : if you’re using homemade pesto, you genuinely need less than with store-bought. Homemade is more concentrated, more fragrant, more everything. Five tablespoons is the right amount for homemade. If you’re using a jar from the refrigerated section of the supermarket, I’d start at 7 and taste from there.

Pesto Pasta Salad — Recipe

Ingredients — Advice & key points

  • Short pasta : Fusilli, farfalle, penne, rotini — anything with nooks and crannies that can hold onto the sauce. Long pasta just doesn’t work in a cold salad, it slides right off. I usually go for fusilli.
  • Cherry tomatoes : Cut them in half. This is not optional — whole cherry tomatoes in a pasta salad are an experience nobody asks for. Half is the move.
  • Raw ham : Prosciutto crudo, Parma ham, Serrano — whatever your local deli has. Tear or cut it into small strips, not too thin. You want a bit of texture.
  • Mini mozzarella balls : Also called ciliegine or bocconcini. I strongly prefer the mini version for this — they integrate into the salad way better than torn chunks of a big ball. If you can only find large mozzarella, tear it into rough pieces.
  • Pesto : Ideally homemade — and if you haven’t made it, this salad is a very good reason to start. The flavour difference is significant. If you’re going store-bought, buy it from the refrigerated section, not the shelf-stable jar. And use more of it.

Cooking process — Advice & key points

  • Cook your pasta al dente, and salt the water properly. 10g of salt per litre is the standard. Undersalted pasta water makes undersalted pasta makes an underseasoned salad — there’s no fixing it later.
  • Reserve your pasta water before draining. Two to three tablespoons is enough. Don’t skip this step — this is what makes the pesto coat properly instead of clumping.
  • Cool the pasta quickly. Once drained, spread it on a baking sheet or rinse briefly with cold water to stop the cooking and cool it down before adding the pesto. If the pasta is too hot, the basil in the pesto cooks slightly and loses its freshness.
  • Mix the pesto with pasta water, unless your pesto is already quite liquidy. You can add it and mix it with pasta before adding the remaining ingredients -tomatoes, ham and mozzarella are a bit fragile and don’t need to be manhandled.
  • Taste and adjust salt at the end. The ham and pesto both bring salt, so go easy.