

In Seoul, all I wanted to eat for a quick lunch were Kimbap. There are delicious, healthy, and filling, and I love them.
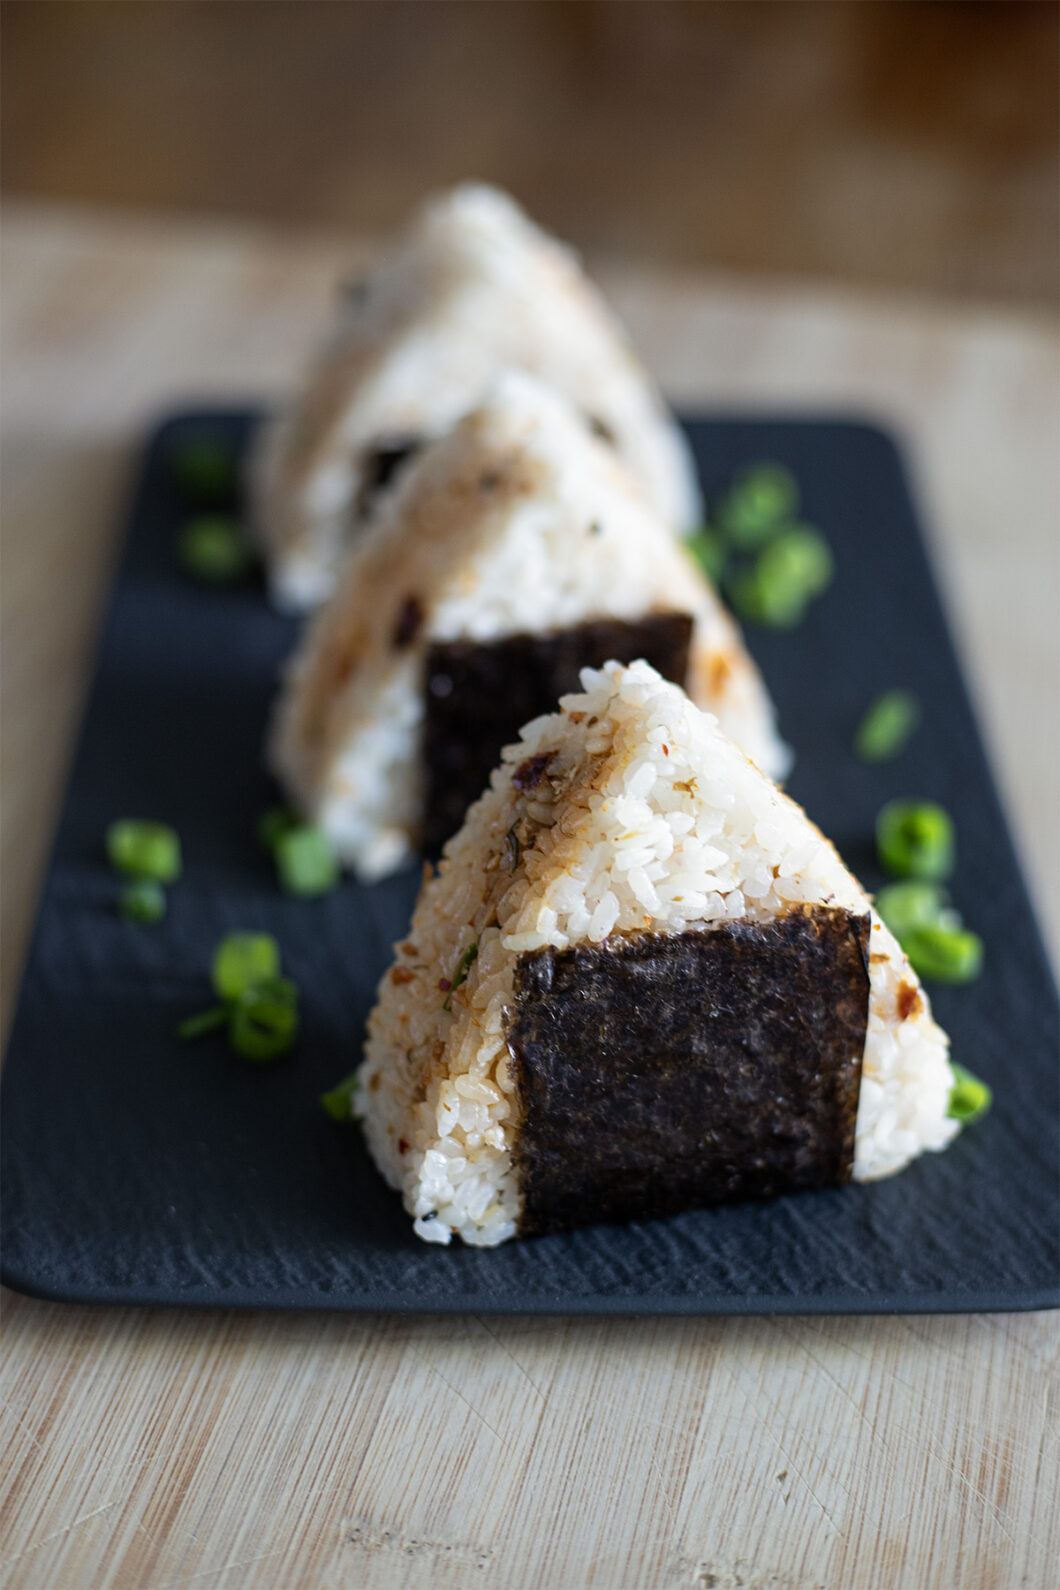
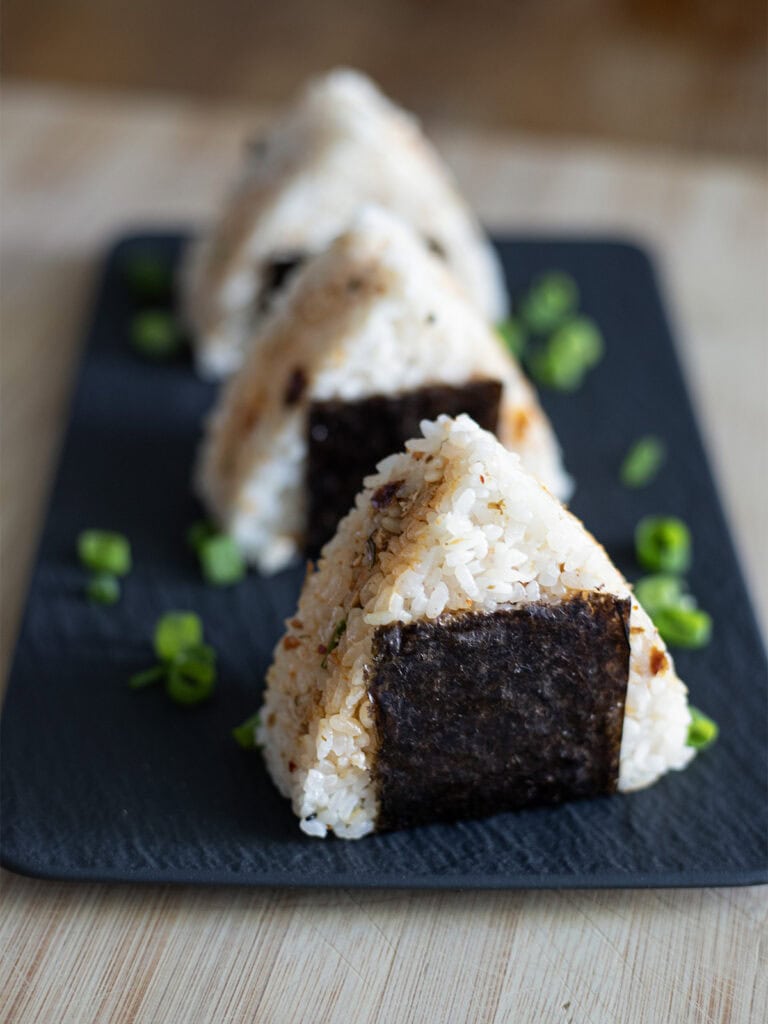
Nevertheless, they’re a bit time-intensive to make. What about their Japanese counterpart then, Onigiri ? Those are Japanese rice balls, often shaped into triangles, and wrapped partially in a sheet of nori (seaweed).
Well, of course it would be simpler. And equally delicious. I love the minimalistic approach of Japan when it comes to cooking ; I’ve learnt that the Japanese principle of wabi-sabi, which finds beauty in simplicity and imperfection, influences many aspects of Japanese culture, including cooking. The idea is to appreciate the purity of the ingredients and the craftsmanship in preparation without unnecessary embellishments.
The Onigiri recipe follows this principle. You won’t have any authentic Japanese filling that contains more than 3 to 4 ingredients. Yet, I kid you not, the end result is much more than the sum of its ingredients.
When you bite into a pretty Onigiri, you get the moist, fluffy rice, that acts as a pillow of comfort. This rice itself must be well-seasoned, and for that purpose, I draw out my ultimate weapon : furikake. It is a popular Japanese seasoning powder which is typically used over rice, and often includes dried fish like bonito flakes, sesame seeds, seaweed, salt and sugar. The one I used is Furikake Piritto Umai – Togarashi, with red pepper and bonito flakes and I absolutely adore it. But feel free to find your favourite amongst the huge variety that exists !
Then for the filling, the most authentic ones are the following :
- Japanese pickled plum (umeboshi),
- Bonito flakes moistened with soy sauce (okaka),
- Salted salmon (shake),
- Tuna mayo,
- Simmered seaweed (kombu),
- Salted cod roe (mentaiko).
Being a basic Westerner, I’m a huge fan of the simple tuna mayo version. I simply decided to make it mine by adding some Buldak hot sauce (for my spicy ramen lovers, you know what I’m talking about!!) and chives.
I must admit I’m not too fond (yet) of the authentic Japanese vegetarian versions of Onigiris with umeboshi or kombu. Therefore, I thought of my vegetarian friends and made a simple Korean-Japanese fusion one, with Kimchi !!
Spicy Tuna / Kimchi Onigiri – Recipe
Ingredients – Advice & key points
- It is important to use short-grain rice here, so that it is sticky enough to shape the Onigiris. Nowadays, you can find it in your grocery store !
- Try to pick an oil-based canned tuna. I know, oil + mayo seems unhealthy, but remember that the oil is drained and that you barely put a tablespoon of filling per onigiri. I’ve tried the recipe with a non-oil-based canned, and it was definitely less tasty.
- For the Buldak sauce, you’d likely need to go to an Asian store to find it. But simply use your usual hot sauce instead !
- Also, if you want to buy :
- Onigiri molds, and
- Onigiri Packagings,
you’ll either find them in Asian stores or online !
Recipe – Advice & key points
- I advise you to use onigiri molds for this recipe. I’ve already formed my onigiris by hand, and you can definetely do it too, but it takes more time to make and is more irregular than the mold version.
- You can keep the Onigiri in the fridge on the day you make them, or even overnight, but definitely use :
- a first layer or cling film to wrap them,
- then, 1 (or 2!) kitchen towels to wrap them again, so that they’ll be protected from the excess cold ! The rice becomes too dry with the direct cold effect.
- I don’t recommend keeping it longer than overnight. If you do, simply make grilled Onigiri (Yaki Onigiri) instead ! Brush the leftover onigiri with soy sauce or miso paste and grill them in a skillet until they develop a crispy, golden-brown crust.
All set ? Let’s dig into it !
Spicy Tuna / Kimchi Onigiri
Description
The n°1 grab & go snack when you think of Japan.
Here, in an upgraded, spicy version with bonito and red pepper furikake ; talk about a strong flavour game.
Ingredients
For the spicy tuna mix
Instructions
Get your rice & tuna mix ready !
Wash your rice several times (4 to 5 usually) until the water gets almost translucent. Add your water (around 1:1 rice to water ratio ; try to add a tad more water though), then let it soak around 20 minutes.
Meanwhile, in a mixing bowl, mix together your chopped scallions, tuna, mayo, soy sauce, Buldak/hot sauce.
Then, cut your Nori sheets in strips that will simply cover the bottom of each onigiri (see picure). Skip this step if using an Onigiri packaging.
Assemble your Onigiris !
When your rice is cooked, put it in a bowl.
Add your furikake, and mix well. Taste it ; it should be well-seasoned. If it tastes bland, add salt.
Set in front of you a small water bowl, your rice, your tuna mix and/or Kimchi if using, your Nori sheet/Onigiri Package and your Onigiri shaper.
Put a bit of water on your work station and on your hands.
Fill 1/3 of your Onigiri shaper with rice.
Add a small tablespoon of filling (spicy tuna or kimchi, or both!).
Fill the rest of your Onigiri shaper with rice, then press everything together.
Add your nori strip.
Et voilà !! You're done !
If using an onigiri packaging, follow the instructions on my video.