Quick Hummus
At every apéro in France, you can be 100% sure there'll be a hummus can somewhere. It is so popular that you'll easily find it highlighted in the refrigerated section of your closest Monoprix or Carrefour, usually with a dozen varieties -spicy, without garlic, with red bell pepper, carrot hummus, you name it.
I myself bought my fair share of ready-made hummus. Truthfully, it comes in handy ; yet no matter the brand nor quality, it's always been a disappointment, taste and texture-wise.
After a bit of research, I had already found a way to make decent hummus within 15 minutes. By that time I wanted a greener version -I love my herbs ! That is why I developed a Quick Green Hummus recipe, with chickpeas and green peas.
But classics are popular for a reason. A few days ago, I had a craving for real hummus. Without funny peas nor exotic veggies nor herbs.
I quickly adapted the recipe, which is therefore exquisitely simple -5 ingredients besides your cupboard essentials ; 15 minutes needed.
There are only 3 simple steps in this recipe :
- Gather your ingredients. Peel your garlic & remove its germ (3mn) ;
- Remove your chickpeas' skins. Pour your chickpeas in a large bowl filled with water, and stir with your hands, slightly rubbing them as you go without crushing them. This will remove most of the chickpeas' skins effortlessly ; they will float towards the surface (5mn) ;
- Blend your ingredients (7mn).
I must apologize though to my Middle eastern people, because such a recipe is not perfectly authentic ; the real way to go would be to you to cook dry chickepeas instead of using canned ones, as the taste is better ; or, as a shortcut, to cook canned ones 20 minutes to make them overcooked, resulting in a softer texture. If you have a bit of extra time, definitely do one or the other ! The end result would be even creamier. But I didn't feel the need here, as the taste and texture remain amazing, all for the time it takes to cook pasta.
The only extra step I am willing to put here besides blending it all together, is to remove the chickpeas' skins. I find that it truly helps in achieving a less grainy texture. You could forgo this step if you want an even quicker recipe, as it won't affect the end taste ; in this case, I recommend using a tbsp more tahini or olive oil, and a tbsp more of water.
No need for a blender by the way ; a food processor is perfect here.
That's all ! You won't go back to store-bought, trust me !
Quick Hummus - Recipe
Ingredients, process - Advice & key points
- Tahini : This ingredient is key in achieving a creamy, silky texture for your hummus. Many Westernized recipes don't include enough tahini ; some Israeli ones go as far as putting equal amounts of tahini and chickpeas. Taste as you go, but I recommend at least 4 tablespoons here.
- Using ice cubes will help in achieving that creamy texture ! If you don't have any, just replace them with cold water.
- Fyi, this recipe yields a very large bowl of hummus! Vastly enough for 6 voracious eaters -more likely 10 regular portion sizes.
- If you want an apéro-sized bowl, halve the recipe !
- I would still advise you to make the whole recipe -I use leftover hummus in wraps and sandwiches, which is always positively yummy.
How to serve your Quick Hummus
- Toppings : My favourite toppings for my Hummus are the following :
- actual chickpeas,
- olive oil (most important topping imho),
- sumac
- and paprika.
- What to eat your Hummus with ? The crowd's favourites often are :
- small pieces of pita bread, or any other type of bread available ;
- carrot sticks (their sweetness pairs perfectly with hummus).
But you can definitely get creative and use red bell pepper strips, celery strips, radishes, crackers...
Now let's apéro !
Forget about store-bought grainy, tasteless hummus ; this 15mn Hummus is just what you needed on your go-to appetizers list.
- 480 grams chickpeas (2 medium cans)
- 5 tablespoons tahini
- 1 small lemon (juiced)
- 1 large garlic clove (without the germ)
- 3 tablespoons olive oil (+ some to drizzle at the end)
- 1 teaspoon cumin
- 1 teaspoon salt (start with 3/4 the amount then adjust)
- 3 large ice cubes (add 1 more as needed)
- Gather your ingredients
Gather your ingredients.
Peel your garlic & remove its germ.
- Remove the chickpeas' skins
Fill a large bowl with water. Add your canned chickpeas.
Stir with your hands, slightly rubbing them as you go, without crushing them.
This will remove most of the chickpeas' skins effortlessly ; they will float towards the surface.
Remove the skins, then drain your chickpeas.
- Blending time
To your food processor, add your garlic, salt, lemon juice, chickpeas, cumin. Blend 1 minute.
Add 1 ice cube. Blend 1 minute.
Add 2 others. Blend 3 minutes.
Add tahini & olive oil. Blend 1 minute.
Adjust the end consistency with more water/tahini as preferred.
- Serve !
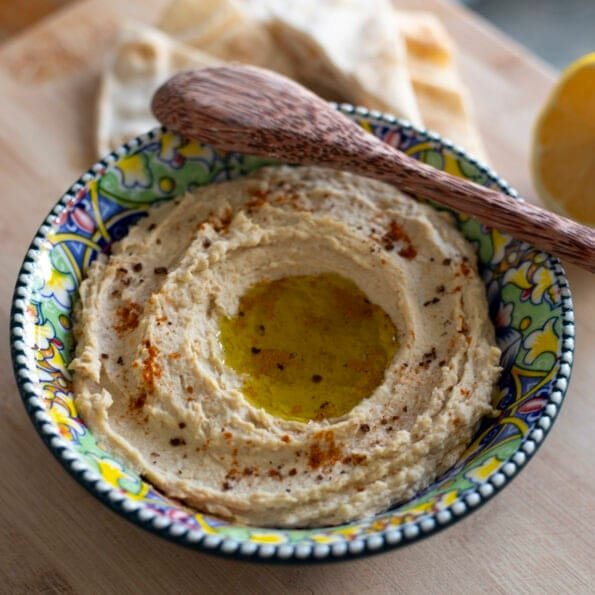
Add your hummus to a hollow plate or a bowl.
Add toppings of your choice ; I recommend to at least drizzle some olive oil on top.
Serve with the veggies and/or bread of your choice.
Et voilà !! You're done !
Thank you for trying out this recipe ! Do not hesitate to leave some feedback. I hope it brightened your day.